Tag: Food

  • Roast cauliflower and quinoa salad

    Roast cauliflower and quinoa salad

    This gorgeous warming salad is inspired and adapted by a recipe from the Gourmet Traveller Australia. As said in my previous post, I’m finding more ways to (excuse the pun) spice up my vegetables and make it into a main dish that is both filling and delicious. Thought I would share a little piece of news with you, I have recently started working for a recipe sharing site called Cookpad, I am expanding their reach to South Africa as their online community manager.They are very successful in Japan, Indonesia, the U.K and the U.S to name but a few. I am very excited to begin this journey to help grow their platform and reach in S.A and I can only hope that this is just the beginning of a fruitful and exciting journey with Cookpad! So if you are an avid home-cook based in South Africa, visit the site and sign up if you love sharing your recipes. Please follow this link if you are interested: https://cookpad.com/za

    A belated happy Mother’s Day to all the rockstar moms! I spent the day with my mom and family, and what a beautiful day it was! Seems that winter is unfortunately on hold for Cape Town at the moment with unusually warm weather in May and not a drop of rain in sight for the parched province.

    This recipe can be made ahead of time and as a great idea can be packed in for lunch to take to work. I usually boil quinoa for my partner and slow roast tomatoes with garlic, with a mix of baby spinach, toasted pumpkin seeds and some canned tuna or leftover chicken works just as well with a drizzle of extra virgin olive oil. It makes me so happy that I can make him something nourishing and uplifting for him to take to work.


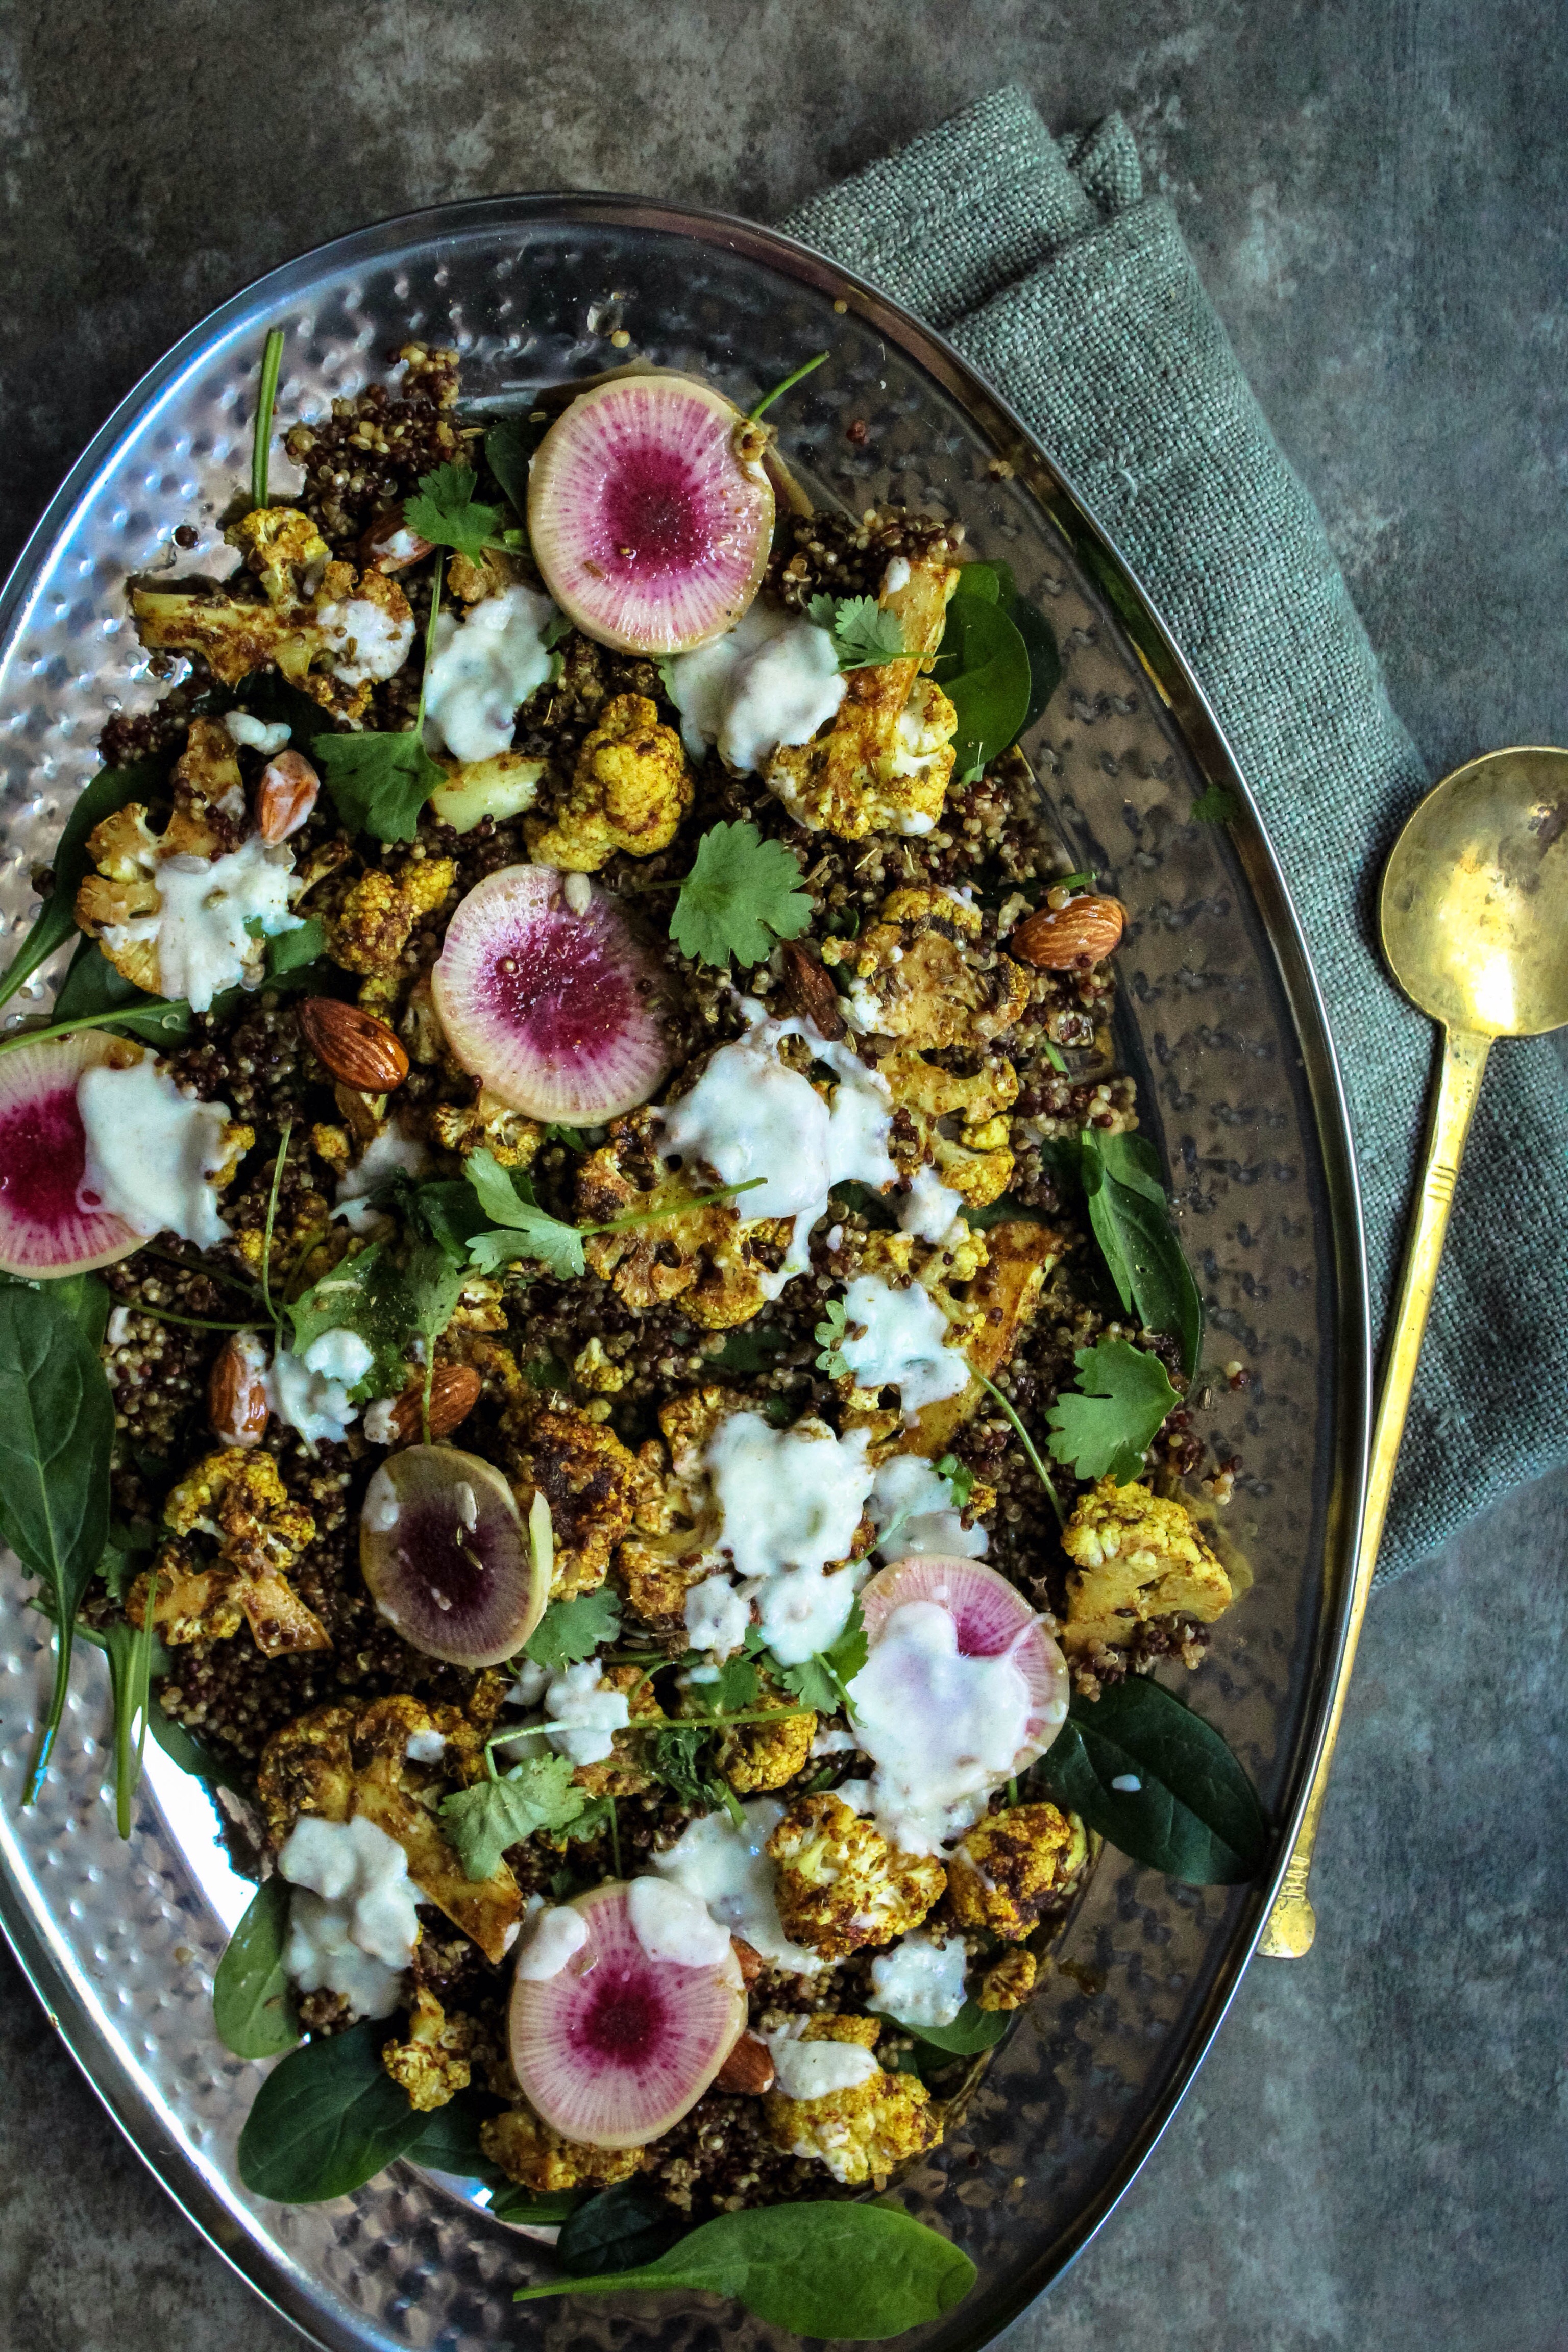
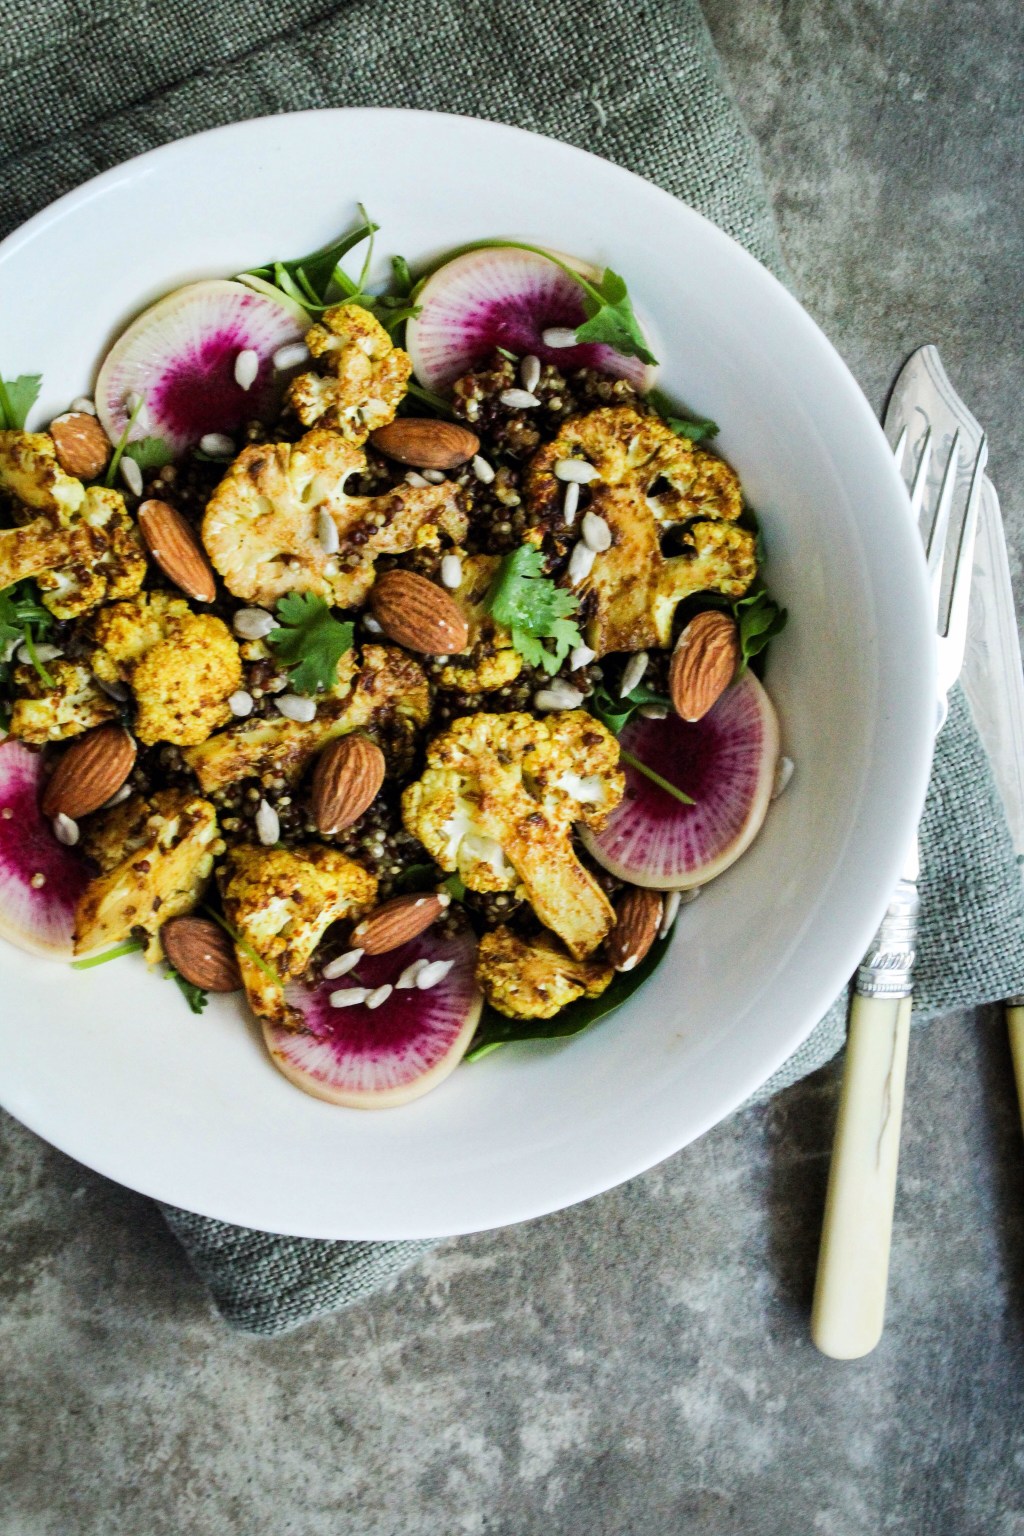
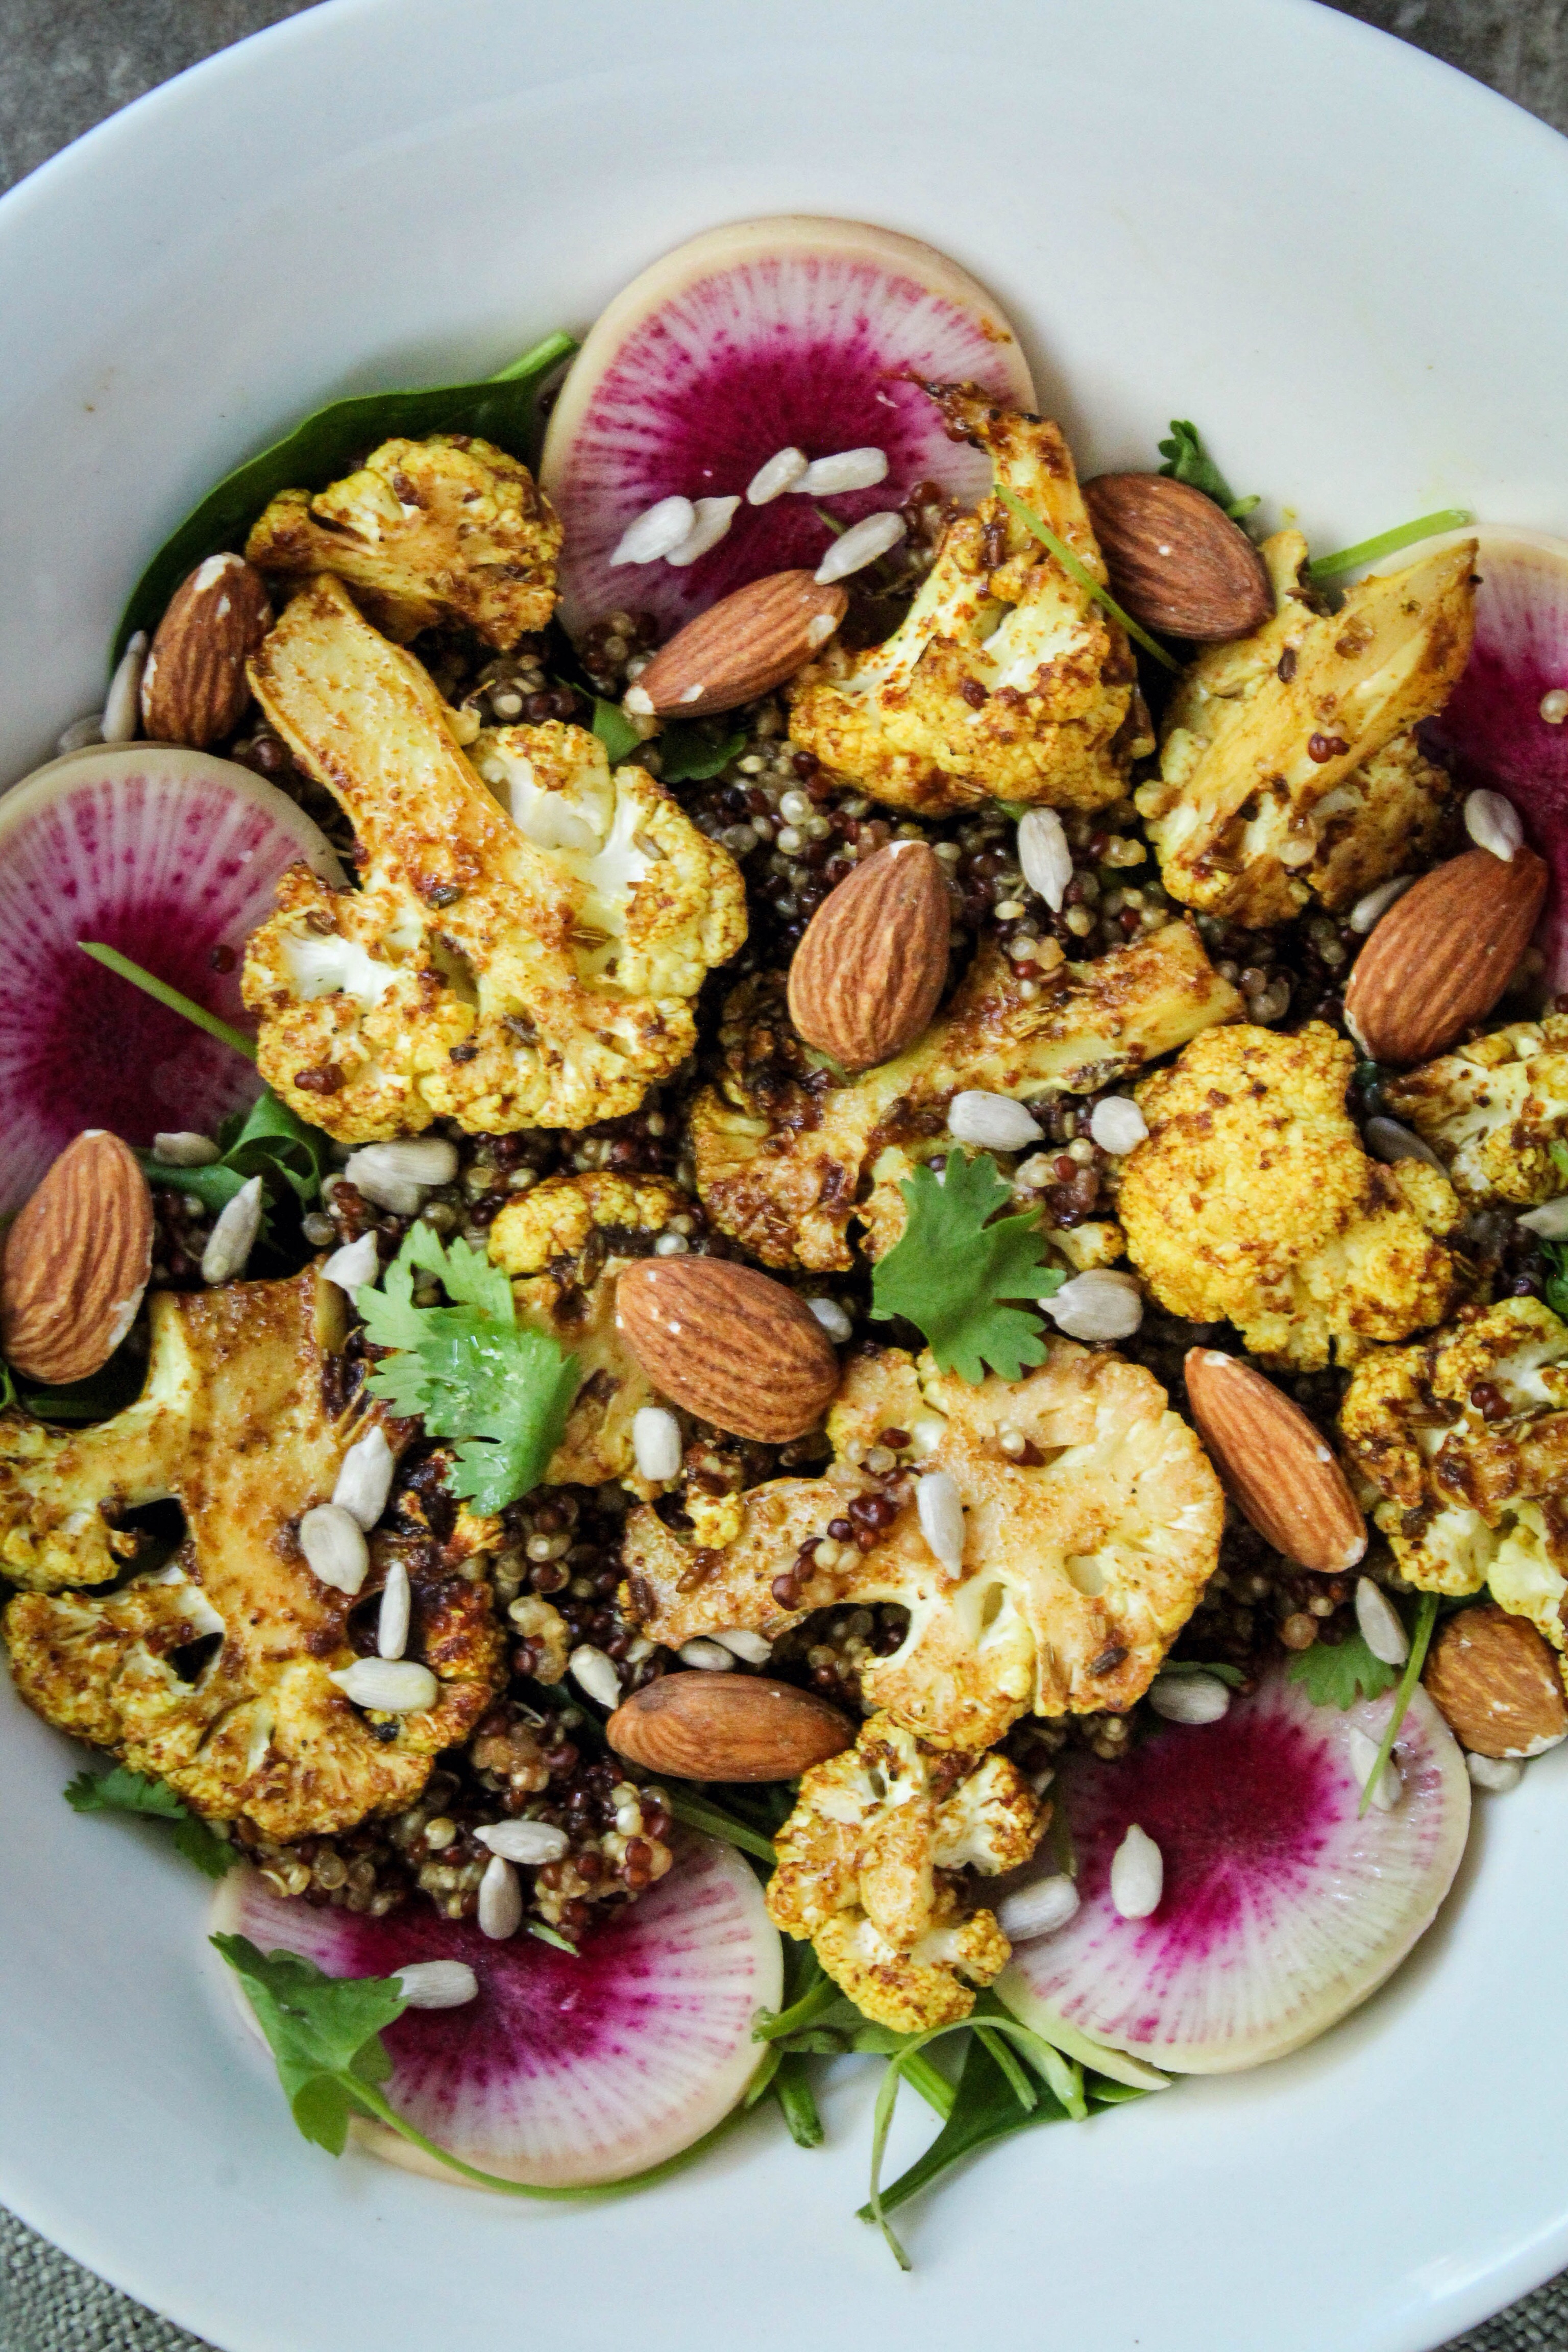
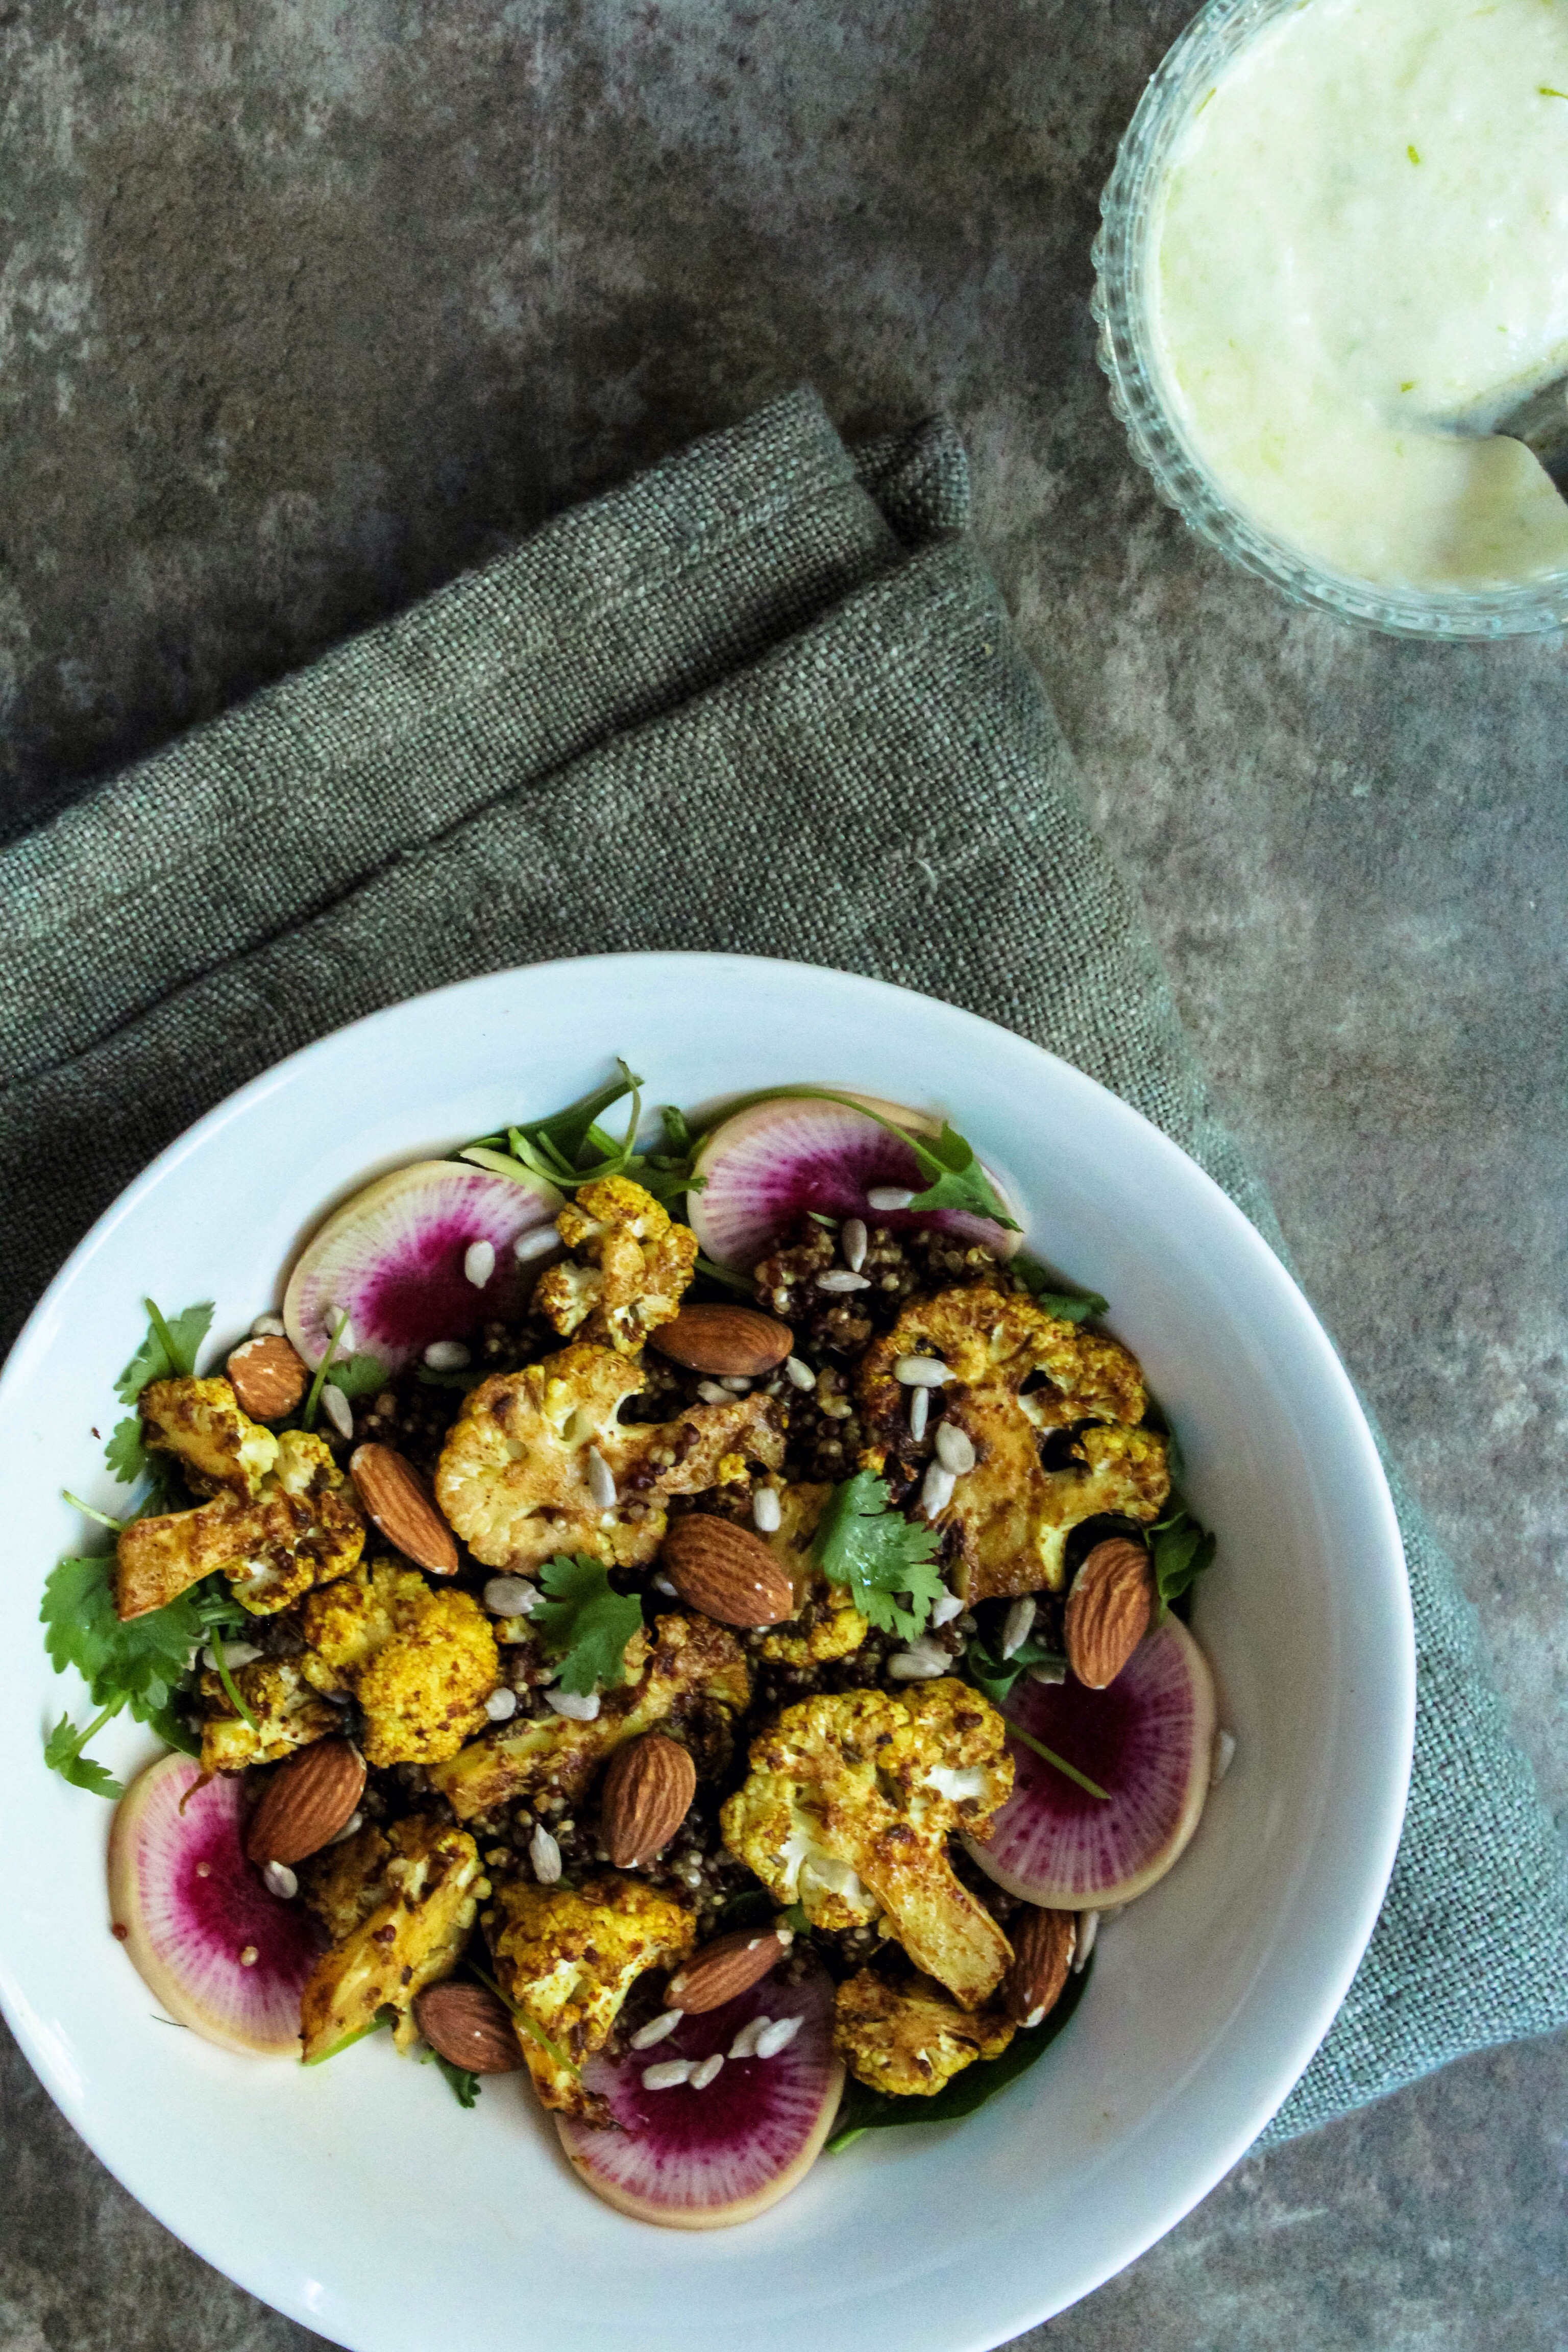
    Roast cauliflower and quinoa salad with a yoghurt dressing: 


    Ingredients:
    300g sliced cauliflower florets

    1 tsp cumin seeds

    1 tsp fennel seeds

    1tsp ground cumin

    1tsp turmeric

    A pinch of sea salt

    1 tbsp olive oil

    1 cup of quinoa ( I used red and white)

    1 cup of vegetable stock

    100g baby spinach leaves

    50g almonds

    50g sunflower seeds
    For the dressing: 


    180ml plain double cream yoghurt

    Zest and juice of half a lemon

    1 garlic clove crushed

    Drizzle of olive oil.
    Method:
    Preheat oven to 180 degrees C. In a dry pan, toast the raw quinoa for 1-2 minutes on a medium to high heat. Remove and transfer to a small saucepan

    With the stock and bring to a simmer for 25 minutes until all liquid has been absorbed and the quinoa is light and fluffy. Set aside to cool.

    Toast the spices, sans the turmeric in a dry pan for 30-40 seconds. Add to a pestle and mortar, adding the turmeric then grind. In a roasting dish, add the cauliflower, toasted spices and drizzle of olive oil, roast for 15 minutes until golden and crisp. To make the dressing, in a small bowl, mix together the crushed garlic, lemon juice and zest along with the olive oil.

    To assemble, in a bowl or plate, add the baby spinach, the quinoa, the roasted spiced cauliflower, almonds, sunflower seeds and a drizzle of olive oil and a lashing of dressing over the salad.

    Enjoy! 🙂

  • Babylonstoren Olive Workshop

    Babylonstoren Olive Workshop

    Every visit, every single time, I always find something new at Babylonstoren. This to me is what keeps me coming back every time, the excitement of exploring something different in the same lush gardens. If you remember, I joined a group for the Bee workshop last October, which was amazing to experience first hand going into the apiary and interacting with the bees and more importantly being educated about bees and their critical importance to life and the food chain, this gave me a higher level of respect and love for bees. 
    To run you through what went down last week Wednesday, we started the day with a short scenic bus trip to the olive orchards where harvesting was well under way already(this time of the year is peak to harvesting times). Our hosts Klass Stoffberg, Linda Costa and Hannes introduced themselves and gave a brief lesson on the FS17 olive orchard which stood in front of us. We were encouraged to help pick the olives by individually picking them of the tree and not shaking off the tree. The former is the preferred method to harvest, as this creates less damage to the tree and olives.

    Another short bus trip down to the olive factory this time, a quick stop by the tasting room for a comforting coffee and biscotti on a overcast nippy day which proved perfect for a walk in the orchards! After refreshments, a walk down to the cellar and through to the other side, was a bustling olive factory, a quick tour followed by an olive oil tasting was enthralling and insightful to learn about the different varietals of olive oils and how they are grown in different soils and environments depending on their nutritional needs.

    Lunch was served at the Greenhouse at a long table, conducive for a talkative lunch hour. Lunch was a tasty lamb pot pie with a vibrant salad picked fresh from their lush gardens or course served along with a can of their award winning Extra Virgin Olive oil. Dessert, a very tart passion fruit cheesecake with chocolate soil.


    The lecture that took place after lunch, I have to be honest was my favourite part of the day! Yes I know, I am a nerd, a food nerd at heart, I do love learning and I believe that we never stop learning. A tasting of faulty olive oils and a worksheet of its positive and negative characteristics were present of which we had to complete to fully understand the difference between its faulty and positive characteristics. A faulty olive oil could have one of four characteristics, namely:

    ▪️Rancidity/oxidation

    ▪️Acidity/wineyness

    ▪️Musty/moldy

    ▪️Muddy sediment
    Did you know? in order for an extra virgin olive oil to be classified as such, it must have no defect or a defect of 2,5% or less out of 10 and fatty acids of 0,8% to be classified as EVOO. The CTC seal on all our local EVOO packaging is not only a stamp of approval of its quality and integrity but an assurance that the EVOO has gone through a local tasting panel.

    How to taste EVOO? Warm a small cup in your hands, take a small sip and allow it to coat your mouth. You should be experience fruitiness hitting your tastebuds and peppery notes coating the back of your throat. This is a good indication of the quality of the oil and its high antioxidants.

    The tasting of table olives was rather surprising to me, because I enjoy only one type of table olive which is the Kalamata. This all changed when I tasted the Beroni and Manzanilla table olives these specific ones were quite large in size and meaty in taste, with no bitter perfume or zesty flavours, which is what I hate from normal green table olives.

    The day ended with a brief exploration mission in the ‘healing garden’and a barefooted walkabout in the chamomile lawns with a likeminded new friend!


    The wealth of knowledge one acquires at these workshops are immeasurably worth it! By no means do I consider myself to be an ‘olive know-it-all’ at least now I can tell the difference between an EVOO and a refined olive oil. An added bonus about these workshops, are that you meet likeminded people and end up going home having made a friend or two!
    For more information on the workshops at Babylonstoren, follow the link and be sure to book way in advance to secure your spot. https://www.babylonstoren.com/experience/workshop

  • Chicken liver pâté.

    Chicken liver pâté.

    Have you ever loathed a particular food for most of your life and one day experience said particular food and find that its actually quite tasty? Growing up, my mom used to fry up chicken livers in a sauce, I remember hating every morsel of any chicken liver dish ever(sorry mom) until as recent as a few years ago my soon to be brother in law, changed this deep rooted hatred into a new found food love with a chicken liver dish I would never forget. The dish was fairly simple in that it was served in a relish, yet packed a flavour punch that bowled over my tastebuds and changed my stance on chicken livers for the rest of my food filled existence.

    The chicken liver pâté is super easy to recreate at home and only requires a blender as special equipment. This recipe is adapted from a Woolworths Taste Magazine recipe.

    Ingredients:
    – 400g Chicken livers

    – 3 Tablespoons of Sherry/Brandy (I only had Port on hand)

    – 300g butter half melted and half cubed

    – 2 Shallots finely chopped

    – A few sprigs of Sage finely chopped

    – A few bay leafs

    – 2 Tablespoons of olive oil

    – 2 Garlic cloves finely chopped

    – 1/4 t nutmeg

    – Salt and pepper to season

    – 50g clarified butter

    – 2 bay leaves

    – 3-6 sage leaves

    Method:
    Fry the chopped shallots until translucent. Add the garlic and chopped sage and cook for 1 minute, set aside.
    In the same pan, increase the heat and add the chicken livers, cook 3 minutes on each side, the livers should be light and with a slight pink colour.

    Be cautious not to overcook, this changes the texture of the pâté to that of a grainy consistency. Pour in the sherry/brandy or in my case the port and cook for a further 2 minutes, the. Add the nutmeg and season to taste.
    In a blender, add the livers with the shallots, garlic and sage. Add the melted butter and blitz to combine. Add the cubed butter and blitz once more to a smooth consistency. Pour into a pâté dish or baking tin would do(just be sure to line with parchment first. Place the sage and bay leaves on top and pour the clarified butter on top. Place in the fridge to set for 2 hours.


    Serve on warm freshly baked bread rolls.

  • Turmeric and lemon muffins

    Turmeric and lemon muffins

    I love baking on weekends, having said so, I haven’t done so in a while. Yesterday, I spotted a recipe from a renowned blogger and someone I admire for her beautiful food photography, the Displaced housewife . This recipe is adapted from her original recipe for the mouthwatering Meyer lemon and Chamomile muffins 
    What drew me to making these delicious looking muffins, were the fact they contained Chamomile. Chamomile being a natural sleep and relaxation aid. On a personal note, in recent years I have been suffering from Insomnia, which makes my polymyalgia worse. I find that moderate exercise and eating healthy seems to help with the symptoms, I don’t care too much for medication and carefully watch what goes into my body.

    A dear aunt of mine, gave me some great advice to drink first thing in the morning, a cup of hot water with a teaspoon of Turmeric. The turmeric is a wonderful anti inflammatory with so many healthy benefits. I’ve only just taken her advice this morning, and will report back to you, if there are any dramatic changes.

    These muffins are so dense and lemony in flavour, I love how the earthiness of the turmeric shines through also picking up on the floral notes of the chamomile.So with that said, I give you turmeric, lemon with a hint of chamomile muffins.


    Ingredients:

    For the Muffins

    -250g granulated sugar

    -2 teaspoons of loose chamomile tea

    -170g canola oil

    -2 large eggs (room temperature)

    -170g buttermilk (room temperature)

    – 50ml milk, room temperature

    -50ml fresh squeezed lemon juice

    -2 tablespoon lemon zest

    – 1 tablespoon of ground turmeric

    -500g of all-purpose flour

    – 2 teaspoon baking powder

    – 1 teaspoon baking soda

    -1/2 teaspoon sea salt

    -Pinch of cinnamon
    For the glaze:

    -1 ½ cup powdered sugar

    -2 tablespoons fresh lemon juice

    – 1 tablespoon lemon zest

    -1 tablespoon milk
    Method:
    Preheat oven to 180 degrees C. Place a rack in the top third of the oven. Line a muffin tin with muffin liners or spray with nonstick cooking spray or lightly grease with butter or canola oil. Place the sugar and 2 teaspoons of chamomile tea in a blender( I used my NutriBullet with the grinding blades) and grind until the chamomile is reduced to small flecks.

    In a large bowl whisk together your granulated sugar, vegetable oil, sour cream, milk, lemon juice and eggs until well blended.In a medium bowl whisk together the all-purpose flour, baking powder, baking soda, sea salt, cinnamon, cardamom and nutmeg. Add the dry ingredients to the wet ingredients and mix until barely blended.

    Pour the batter into the muffin tray filling until just barely ¾ full. Squeeze some lemon over the top and sprinkle with sugar + cinnamon. Let the muffins sit for 15 minutes before putting in the oven…this will help them get a nice crown. Bake for 15 minutes in the top third of the oven or until a toothpick comes out clean. You want the tops to be puffed up and slightly golden.Let cool in the muffin tin for 10 minutes, then use a butter knife to help get them out to finish cooling on a rack. In a separate bowl, whisk together powdered sugar, lemon juice and milk. Drizzle the glaze over the muffins. In my photos you will notice I added a dash of turmeric to my muffins, I did this for dramatic colour contrast, of course, you don’t have to do this, to avoid a yellow mouth and hands 🙂

    Happy weekend baking!

    Dominique x

  • Honey and Mustard Pork meatballs with pumpkin tagliatelle.

    Honey and Mustard Pork meatballs with pumpkin tagliatelle.

    The pairing of pork with flavours like honey, mustard and sage not only enhance the natural sweet flavour of pork but celebrate its umami undertones. This week’s midweek meal is a budget buster, super easy to make and best of all it takes only 20 minutes to magically whip up!
    Like many others, I constantly find myself stuck in a rut when it comes to weekly meals and making the same things for convenience sake. Each week, usually as a mid week meal, I make pork and sage bangers, using one of my jars I recycle to use as salad dressing jars(a tip I picked up from Siba from Siba’s Table) I mix some honey, mustard, olive oil and a squeeze of lemon juice and give it a vigorous shake to combine I then proceed to drizzle over the bangers then roast in the oven for 20 minutes to achieve a crisp and golden brown banger. The perfect accompaniment for me is runny polenta studded with butter of course, placing the bangers on top of the polenta and using the pan juices to dress the dish. This for me, is the ultimate comfort food dish.


    So in rebellion of boring mid-week meals and costly healthy food, I’ve decided to pimp up the usual pork bangers and give it a lighter more fitting facelift for end of summer days.
    Honey and Mustard Pork Meatballs with Pumpkin Tagliatelle with crispy sage. 
    Ingredients:

    -350g pack of Pork bangers

    -2 Tablespoons of honey

    -2 tablespoons of extra virgin olive oil

    -1 tablespoon of whole grain mustard

    -1 pack of pumpkin tagliatelle(or any spiralized veg for that matter)

    -a few sprigs of sage

    -a knob of butter or tablespoon of coconut oil

    -1 tablespoon of coconut oil to flash fry the pumpkin tagliatelle.
    Method:

    Preheat oven to 180 degrees C. Remove the meat from the bangers roll into balls and place in a oven tray/dish. In a jar or bowl, add the honey, mustard, olive oil and lemon juice mix or shake until incorporated. Place the pork meatballs in the tray and pour over the honey and mustard glaze and roast for 20 minutes until golden brown. In a pan, flash fry the pumpkin tagliatelle in the coconut oil for 1 minute on high, place in a separate bowl and set aside to serve with the meatballs. Using the same pan, add the knob of butter or more coconut oil and fry the sage leaves until crispy. Take off the heat and set aside. On a plate, place the pumpkin tagliatelle (I sprinkled a little dukkah and chilli flakes over the veg pasta) place the meatballs on top with the crispy sage leaves using the leftover pan juices drizzle over the dish and serve with grated Parmesan.

  • Aubergine fries with a honey balsamic drizzle.

    Aubergine fries with a honey balsamic drizzle.

    I’ve recently started to  broaden my food magazine perusing to international territory, reading online is one thing but I’m a sucker for good old paging through an actual book/magazine. Yes, I know not very Eco-friendly, but I’m tradionalist at heart! Sadly, we don’t have much of a wide selection of food magazines here in South Africa, so because I scour Delicious Australia’s site on a weekly basis, I spotted the UK version and rushed home to immediately page through it( I do love the smell of fresh magazines) I am quite proud of our food mag scene in S.A but there are so many fresh ideas in the international ones  I am so excited to try out all before reading the entire magazine, my excitement seems to get the better of me sometimes… 

    This recipe comes straight out of the September issue of Delicious UK, chosen and submitted by a reader, she described the fries as ‘light, crisp, but not greasy’. 

    Ingredients

    • 3 medium aubergines/eggplants sliced into batons
    • 1Tbsp of Salt
    • 1 medium free-range egg
    • 250ml iced water
    • 90g plain flour
    • 1/2 tsp baking powder
    • 1 litre sunflower/canola oil for deep frying
    • Balsamic glaze to drizzle 

    Method

    Place aubergines batons in a colander and sprinkle over salt.set over a bowl, then place in a fridge for 1-2 hours so the aubergines can release some of their juices and firm up. When ready, lay out on a kitchen towel/paper, and blot firmly and rub to remove excess salt, then set aside.For the batter, whisk the egg and iced water until frothy. Sift the flour and baking powder into a mixing bowl with a pinch of salt, then slowly add the egg mixture in a thin stream into the flour, whisking to combine. Immediately stop whisking when combined.Heat the oil in a deep large pan, the oil should be approximately 180 degrees Celsius, reduce heat to keep at this temperature. In batches, dip the batons in the batter, and with a slotted spoon lift out to place gently in the oil(always away from you) and fry for 4-5 minutes until golden and crisp. Drain on kitchen paper. Serve with balsamic glaze, or like me, you can mix a little balsamic vinegar with honey and drizzle over the fries. As an extra special touch I finely grated Grana Padano Parmesan cheese over the fries, because why not, right? 

    These fries are life-changing, and such a great substitute to potato fries. The crunch on these fries are incredible, the flavour is that of a natural umami coupled with a sweet twist! I’m hooked! And definitely making these  for when I have friends or family over. 

    Let’s all make Meat-free Monday’s exciting again! 

    Dominique x