Tag: Food Photography

  • Roasted red grape and rosemary focaccia. 

    Roasted red grape and rosemary focaccia. 

    I’ve been struggling to come up with blog posts lately, mainly suffering from ‘writers block’, which to me is weird as I am immensely passionate about fare and find I can talk about food for hours on end if you pick my brain I will happily engage in conversation about my basic knowledge of food. However there’s just one little problem, you see I’m an introvert, and a rather shy one. But like an onion I have so many layers, if you peel me back… 

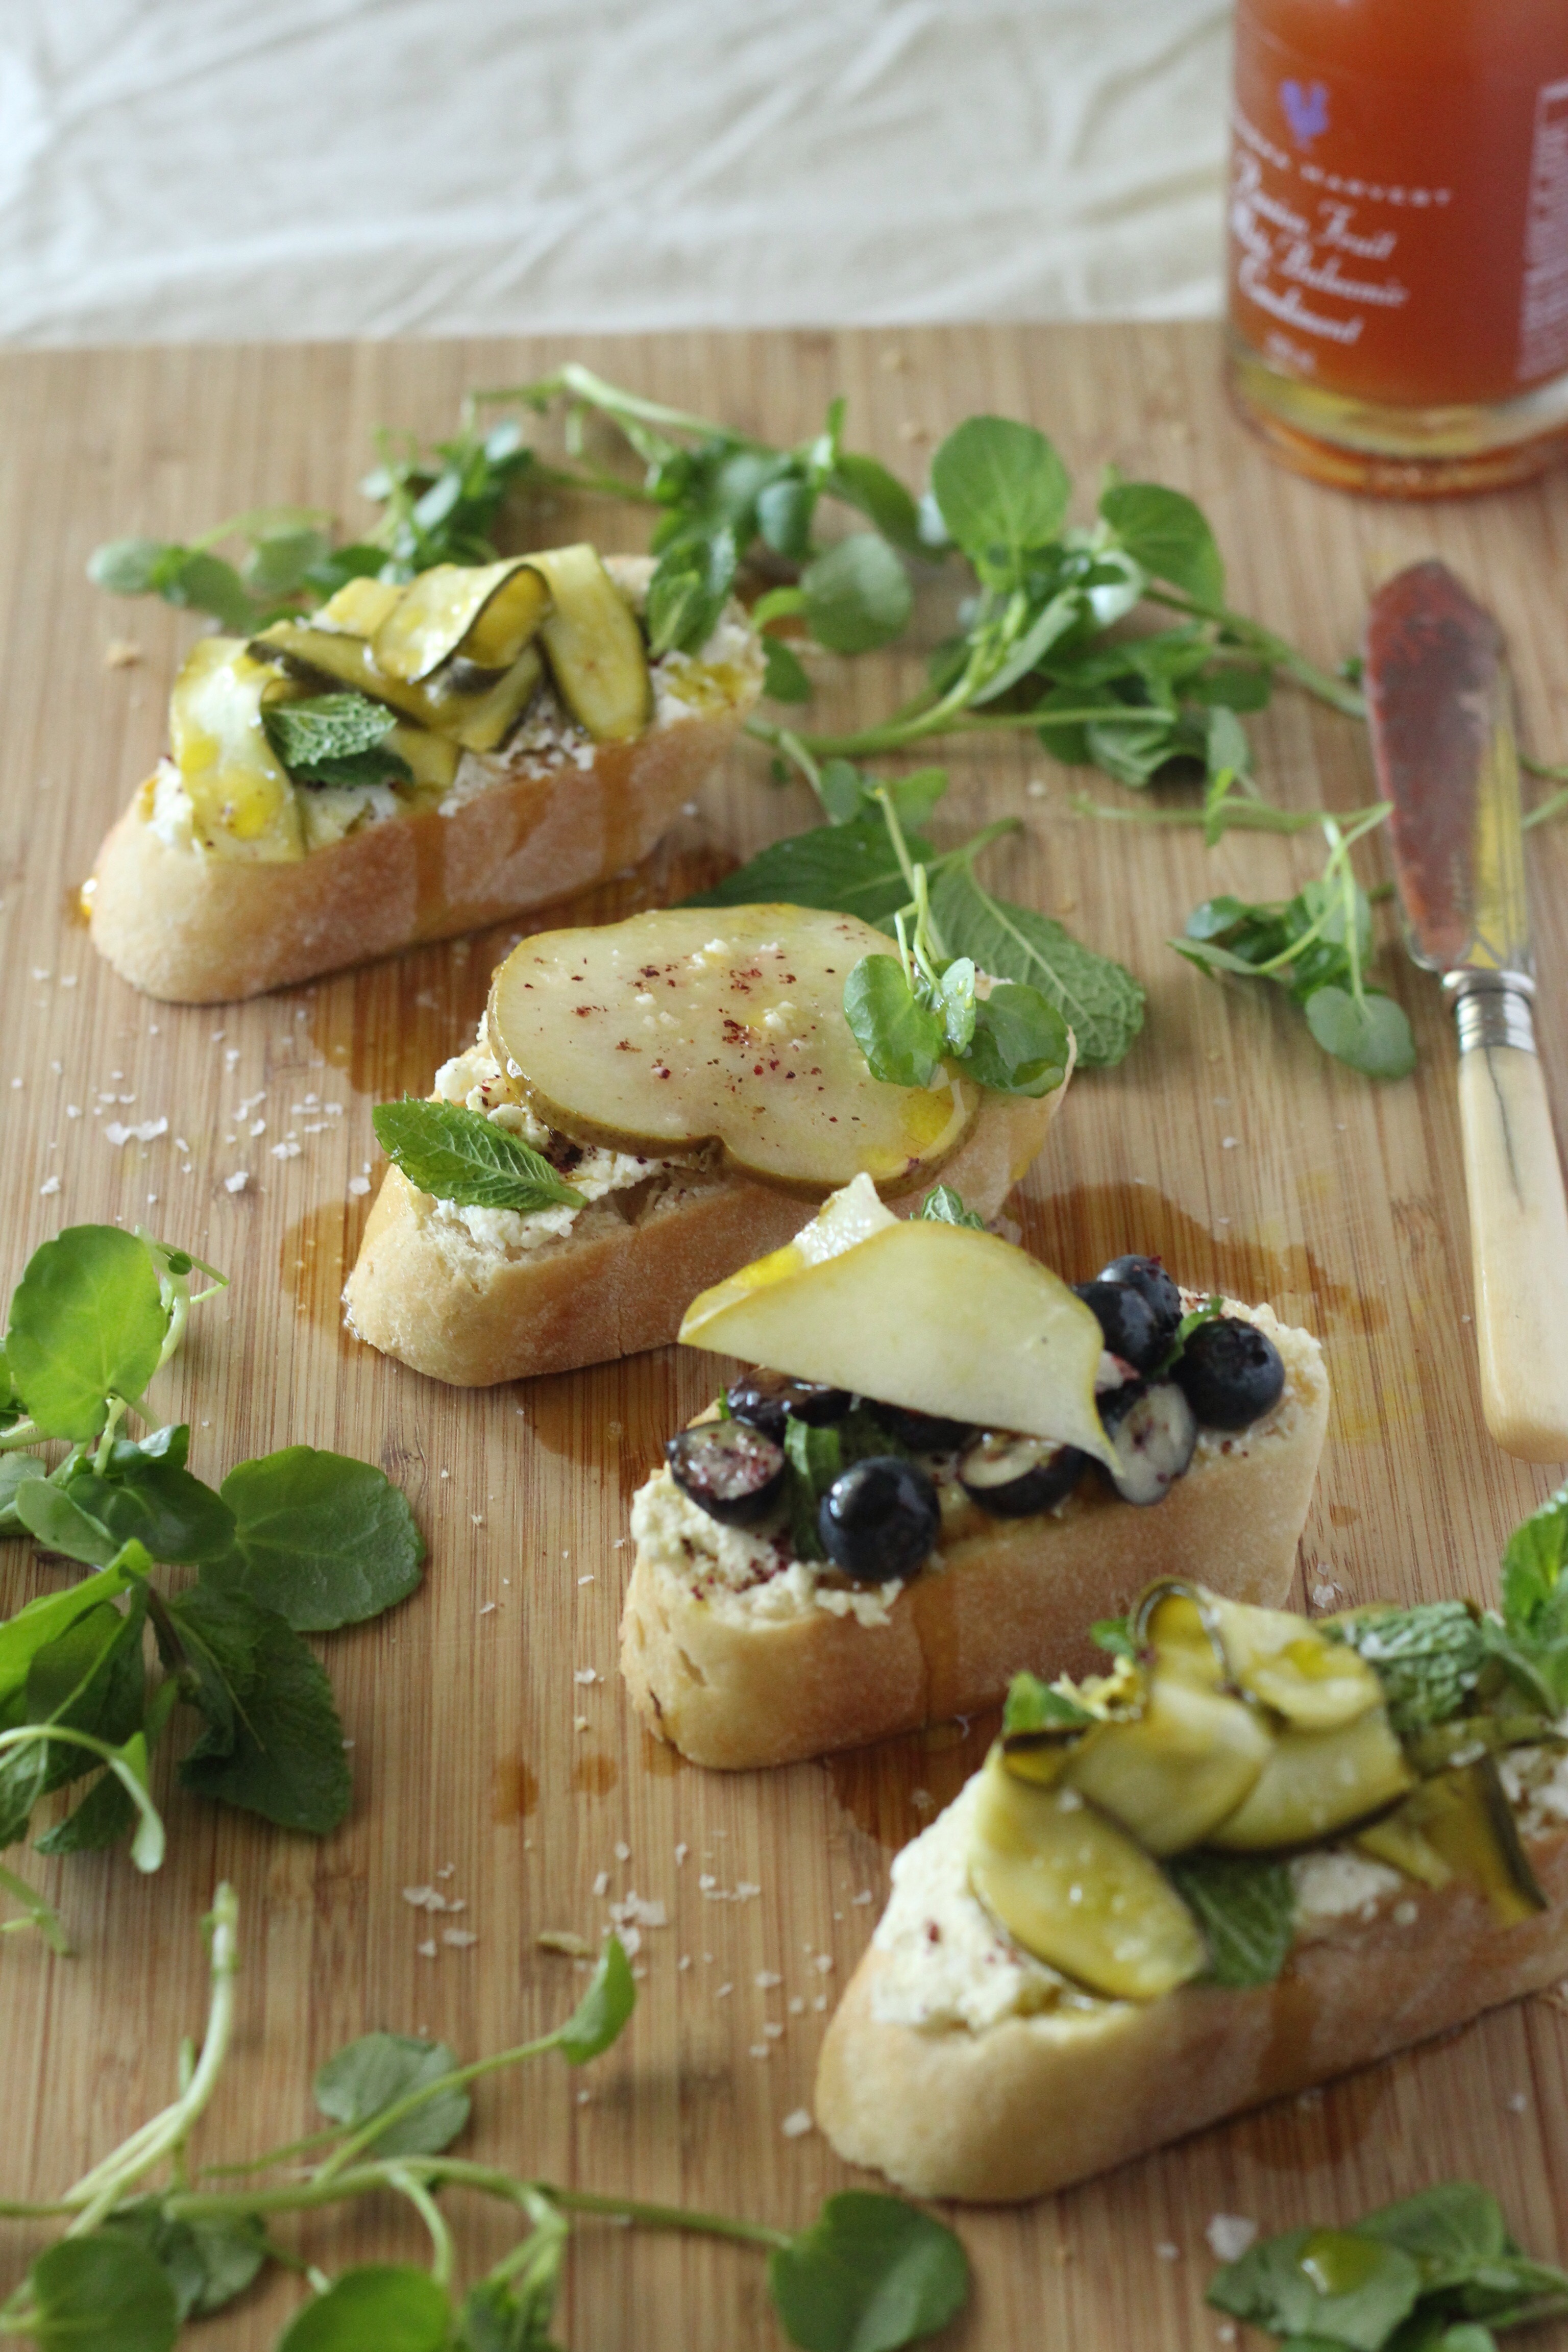
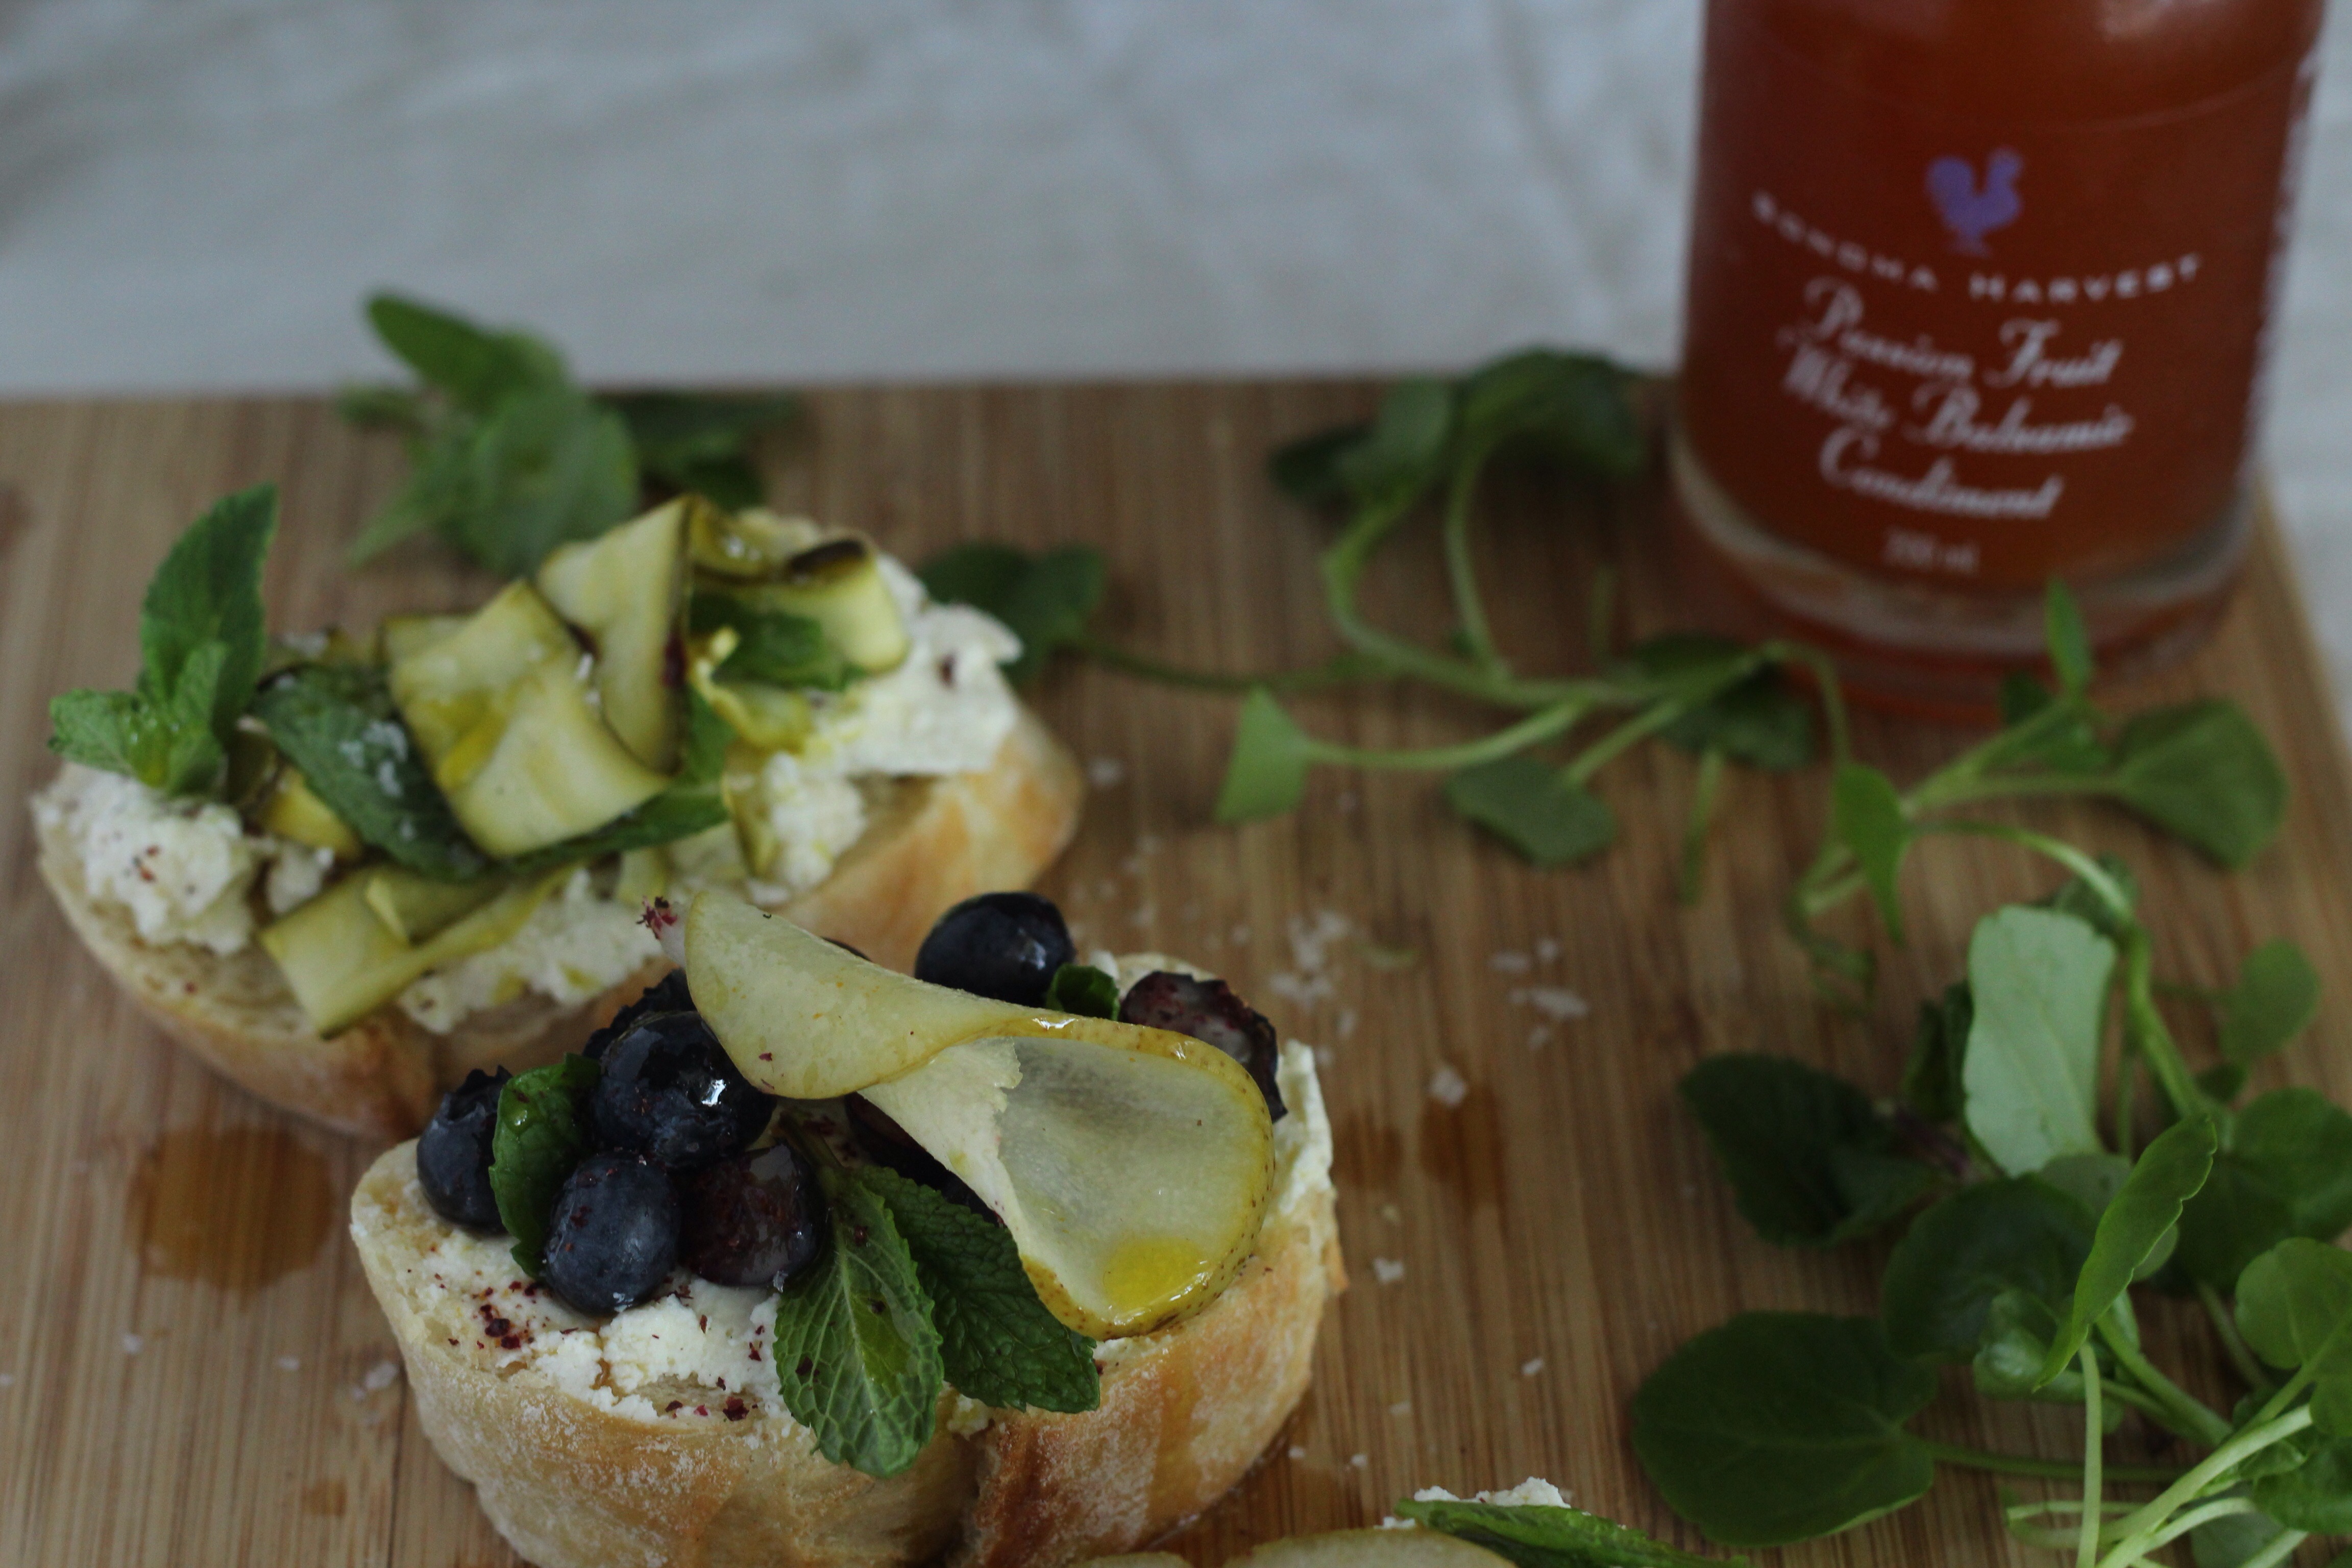
    I tend to compose posts and recreate recipes only when inspiration has struck. My kind of Inspiration, could be that instantaneous revelation of how ‘ugly’ distorted veg is hardly ever used these days, or asking myself questions, like “why can’t candy floss be savoury?” Yes, these are indeed the strange yet wondrous questions I ask myself. 

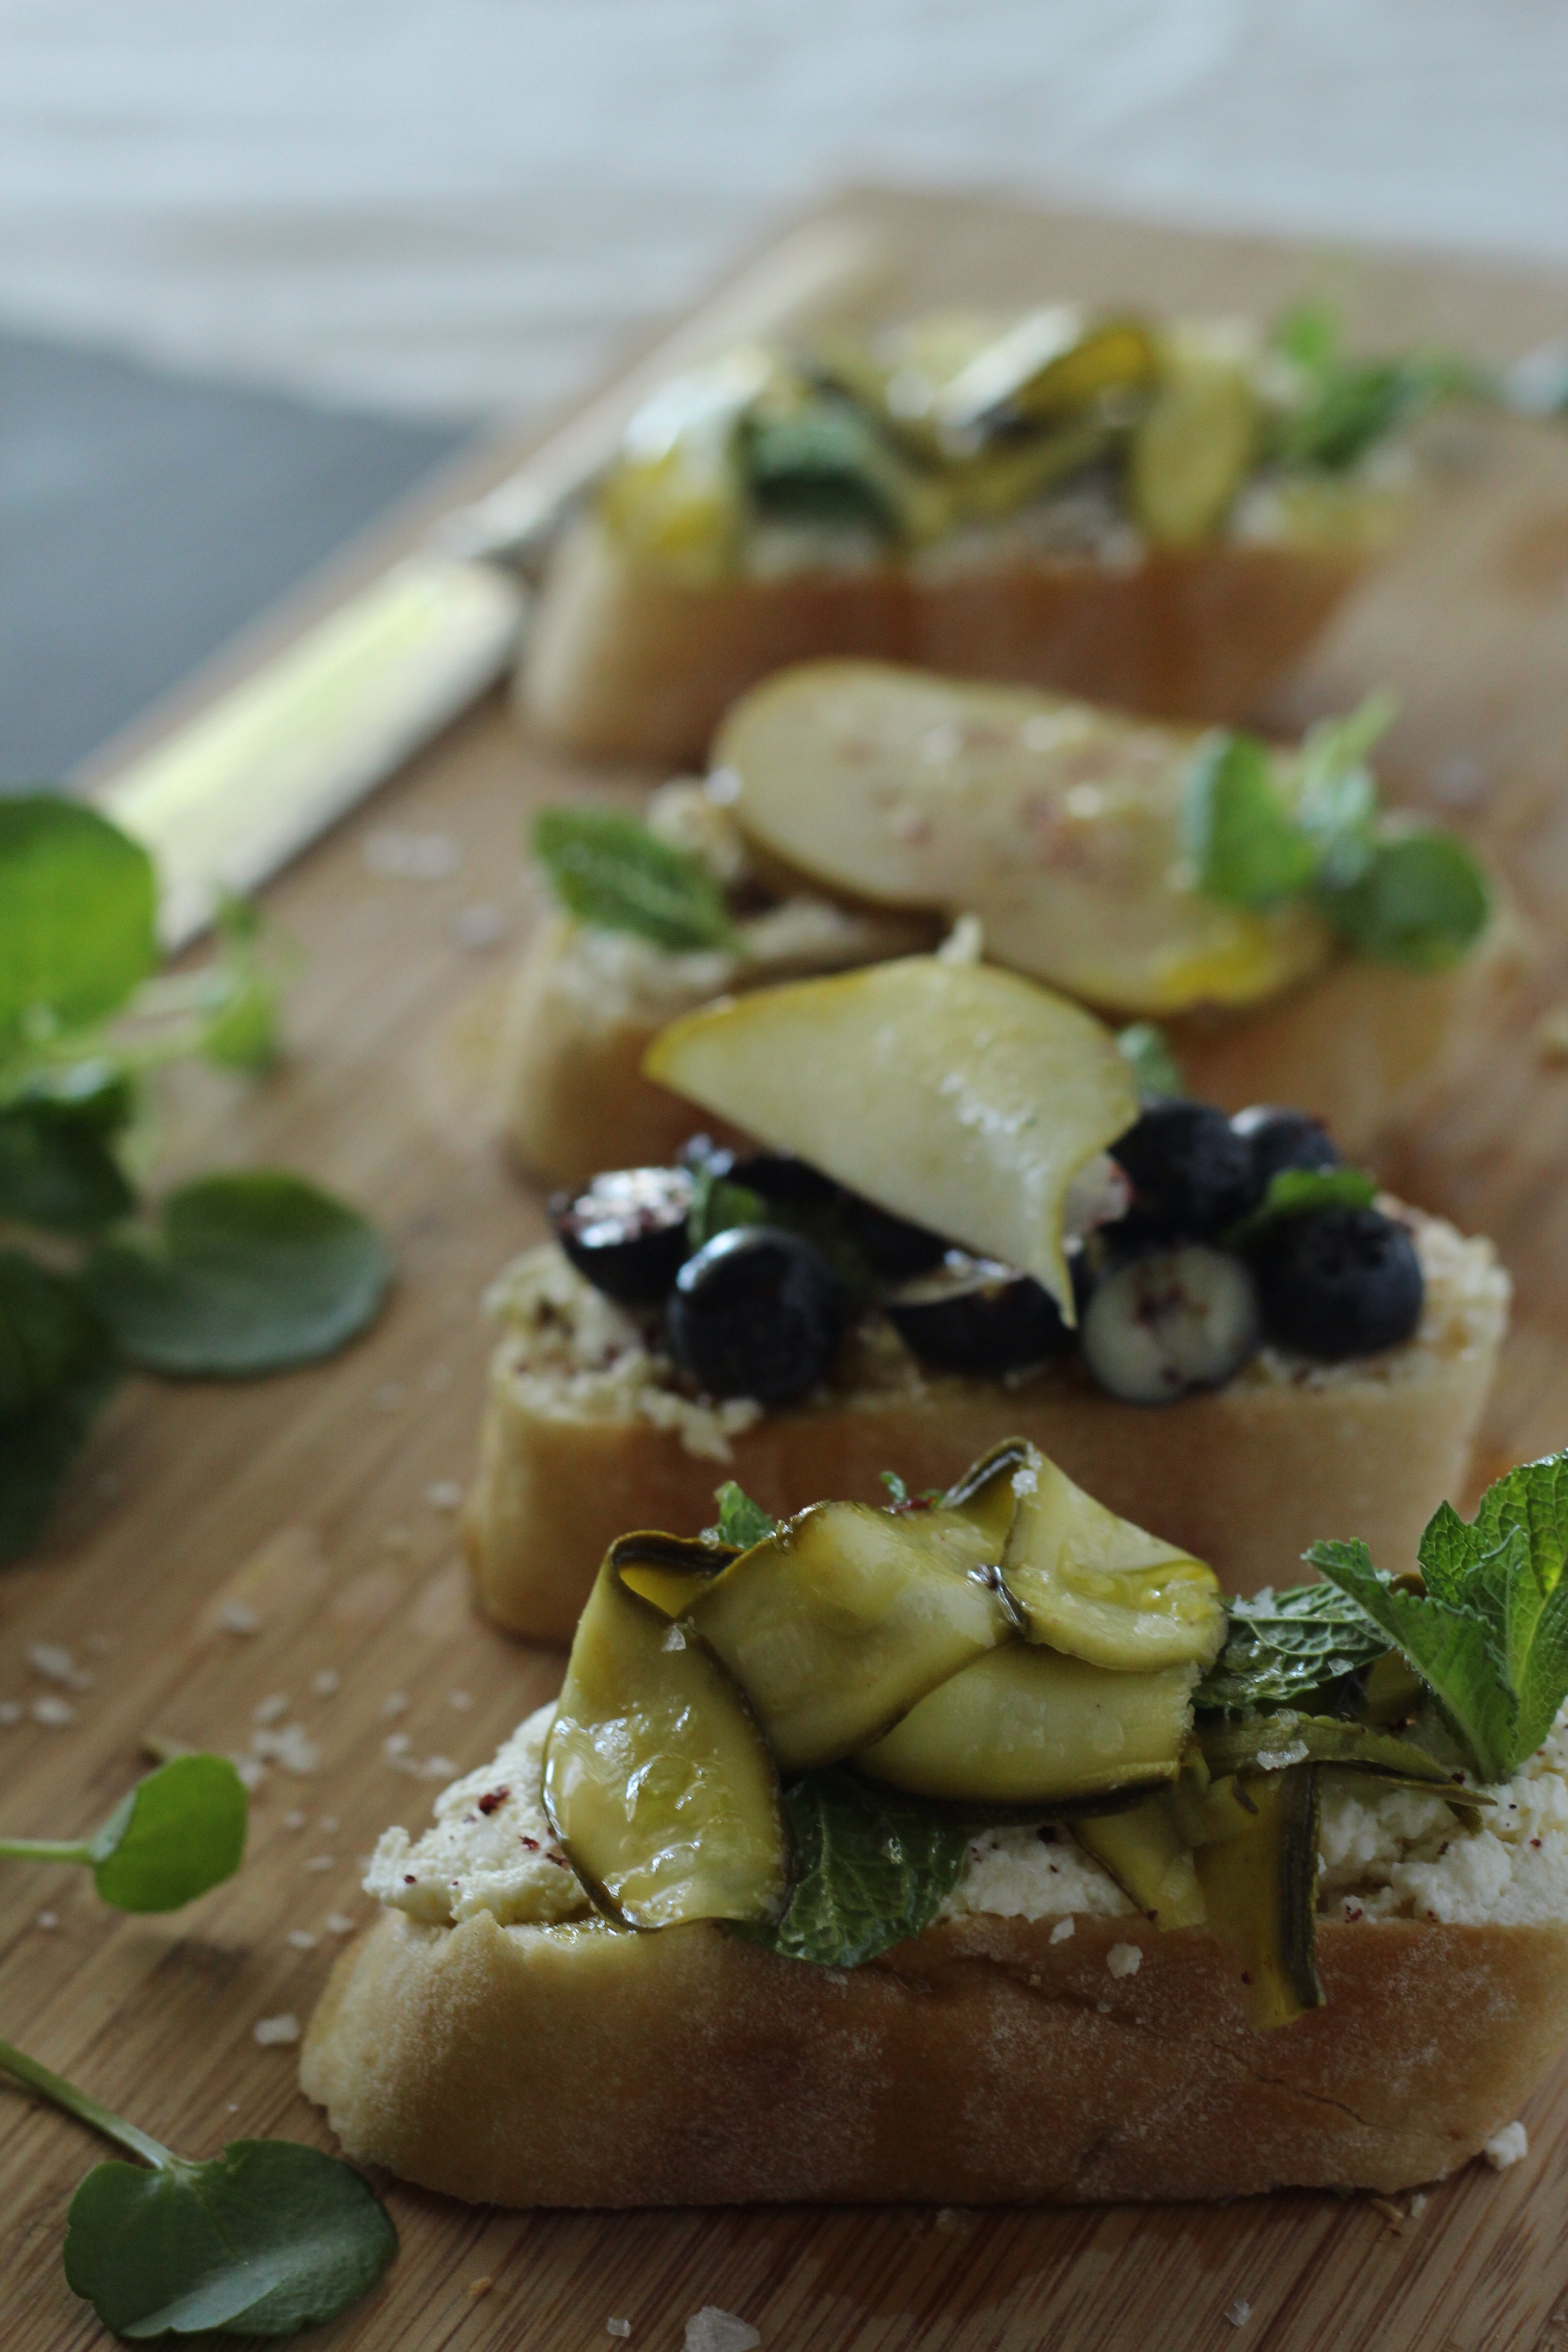
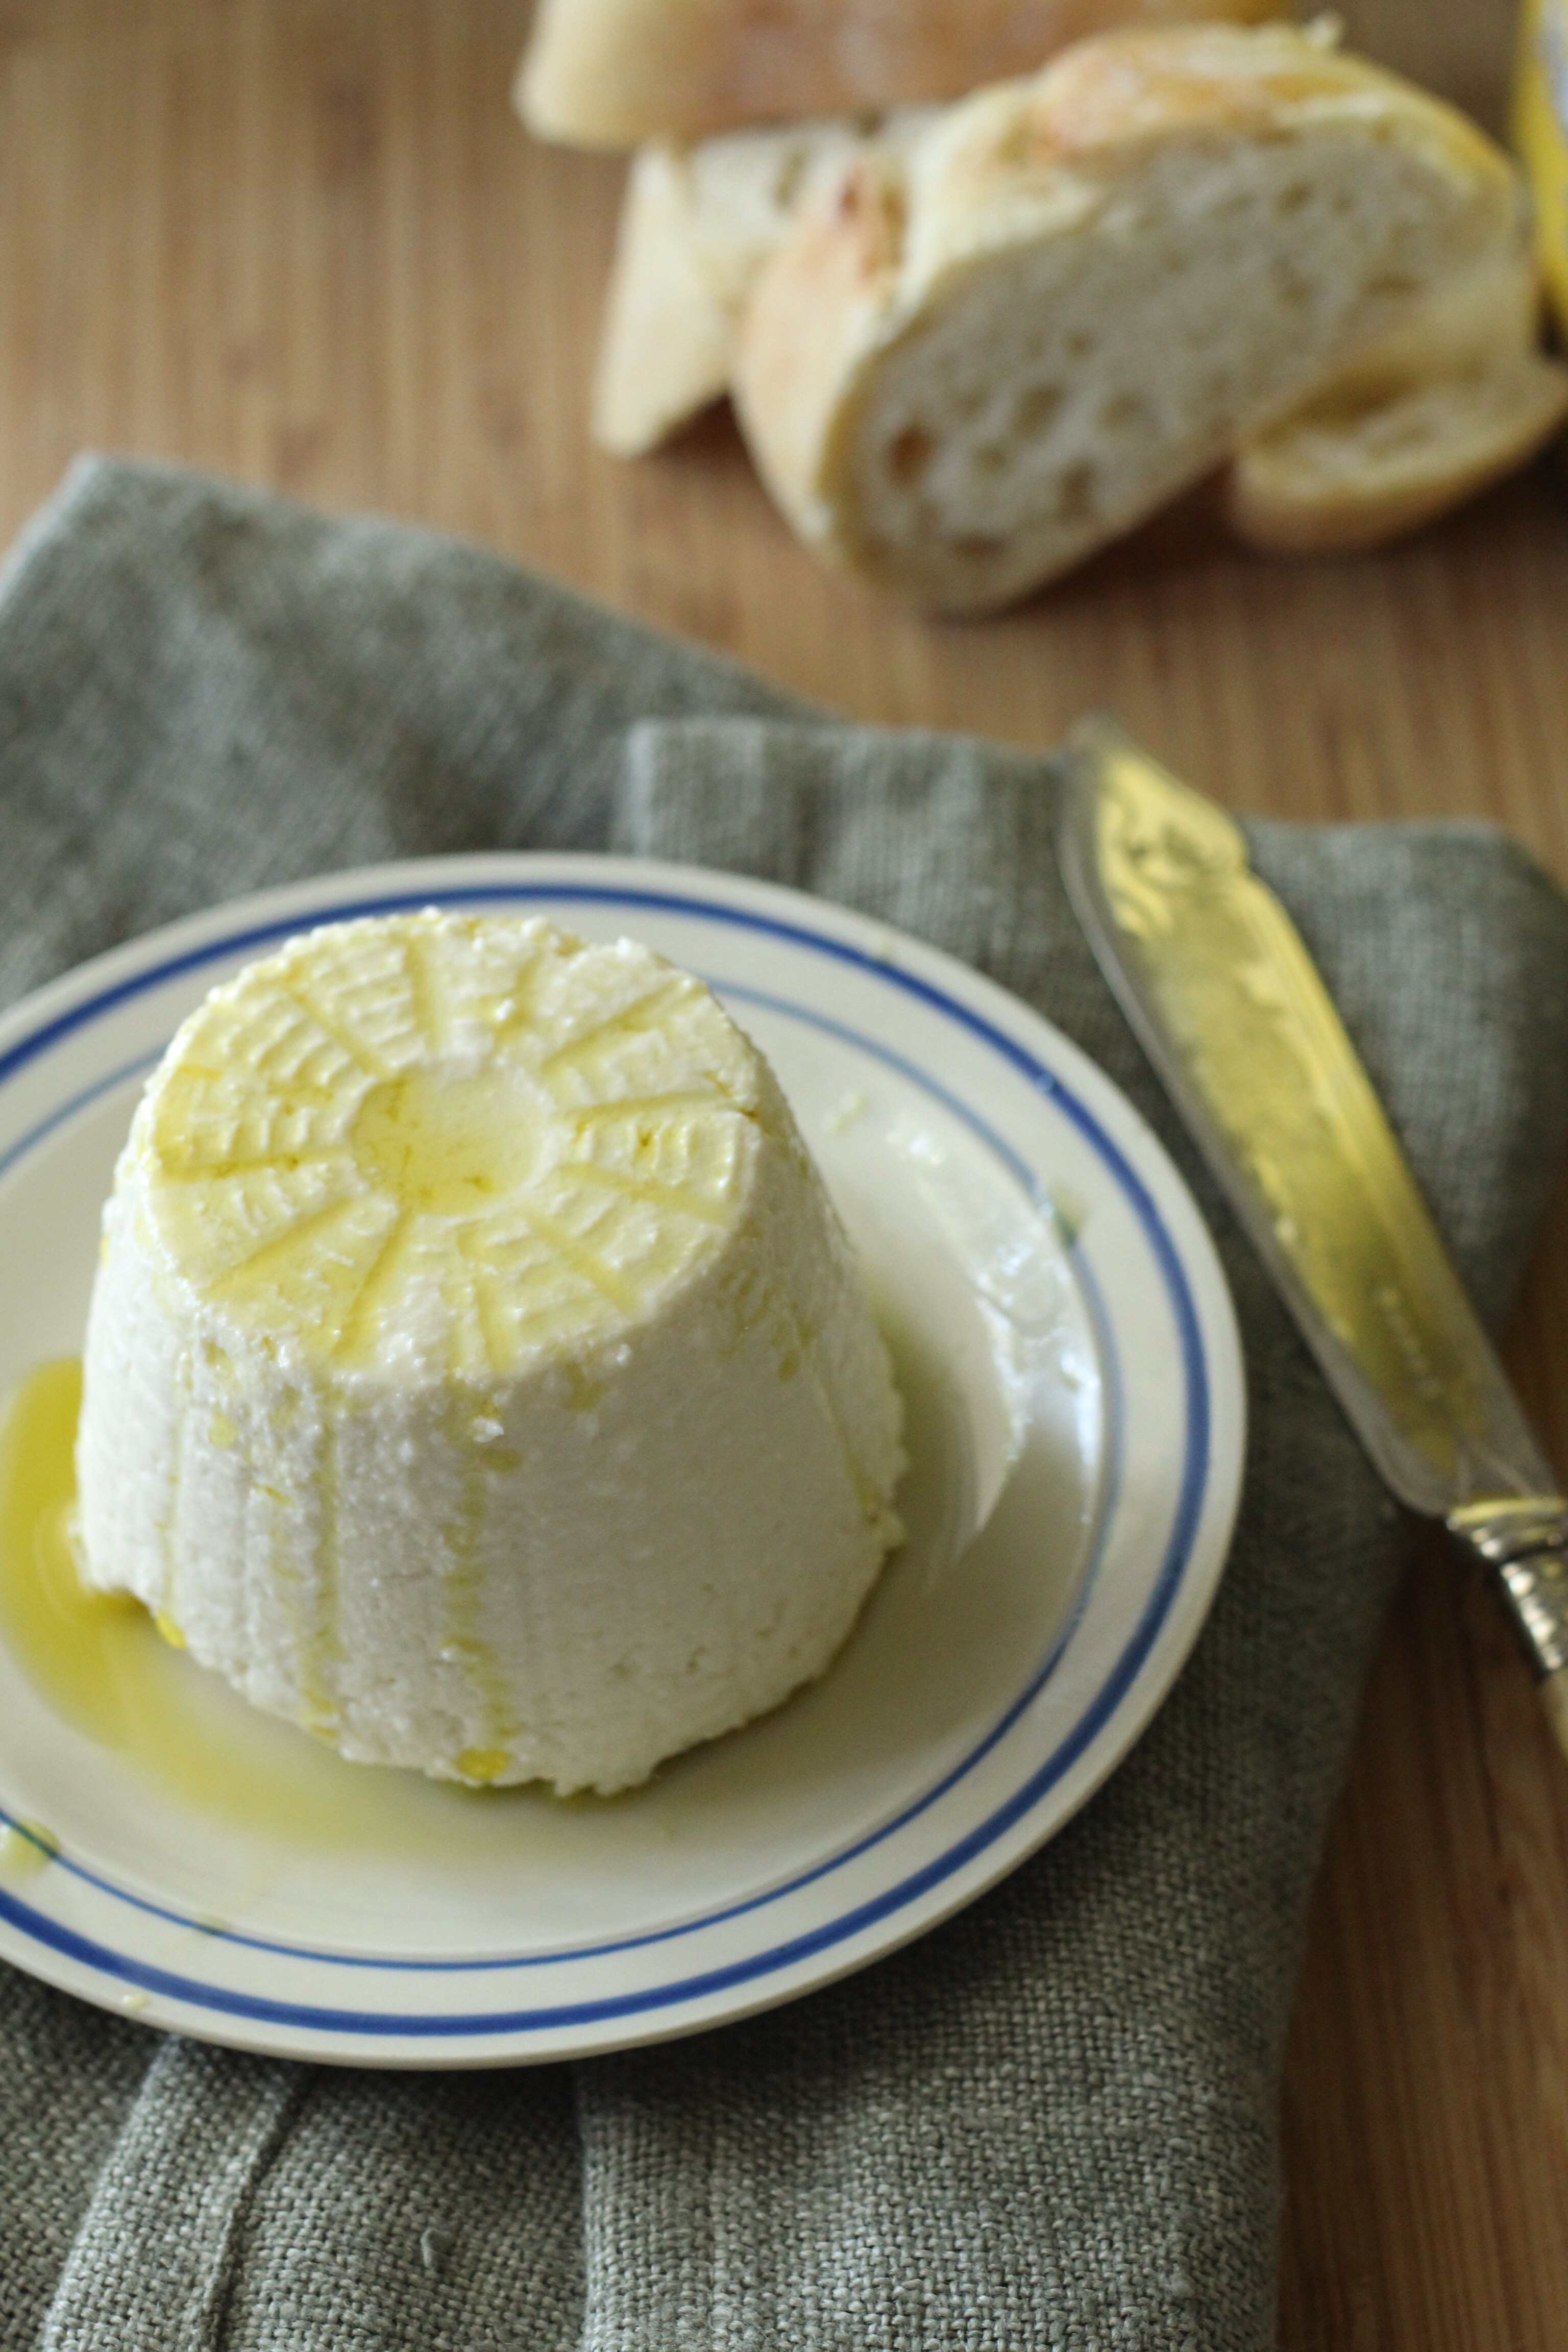
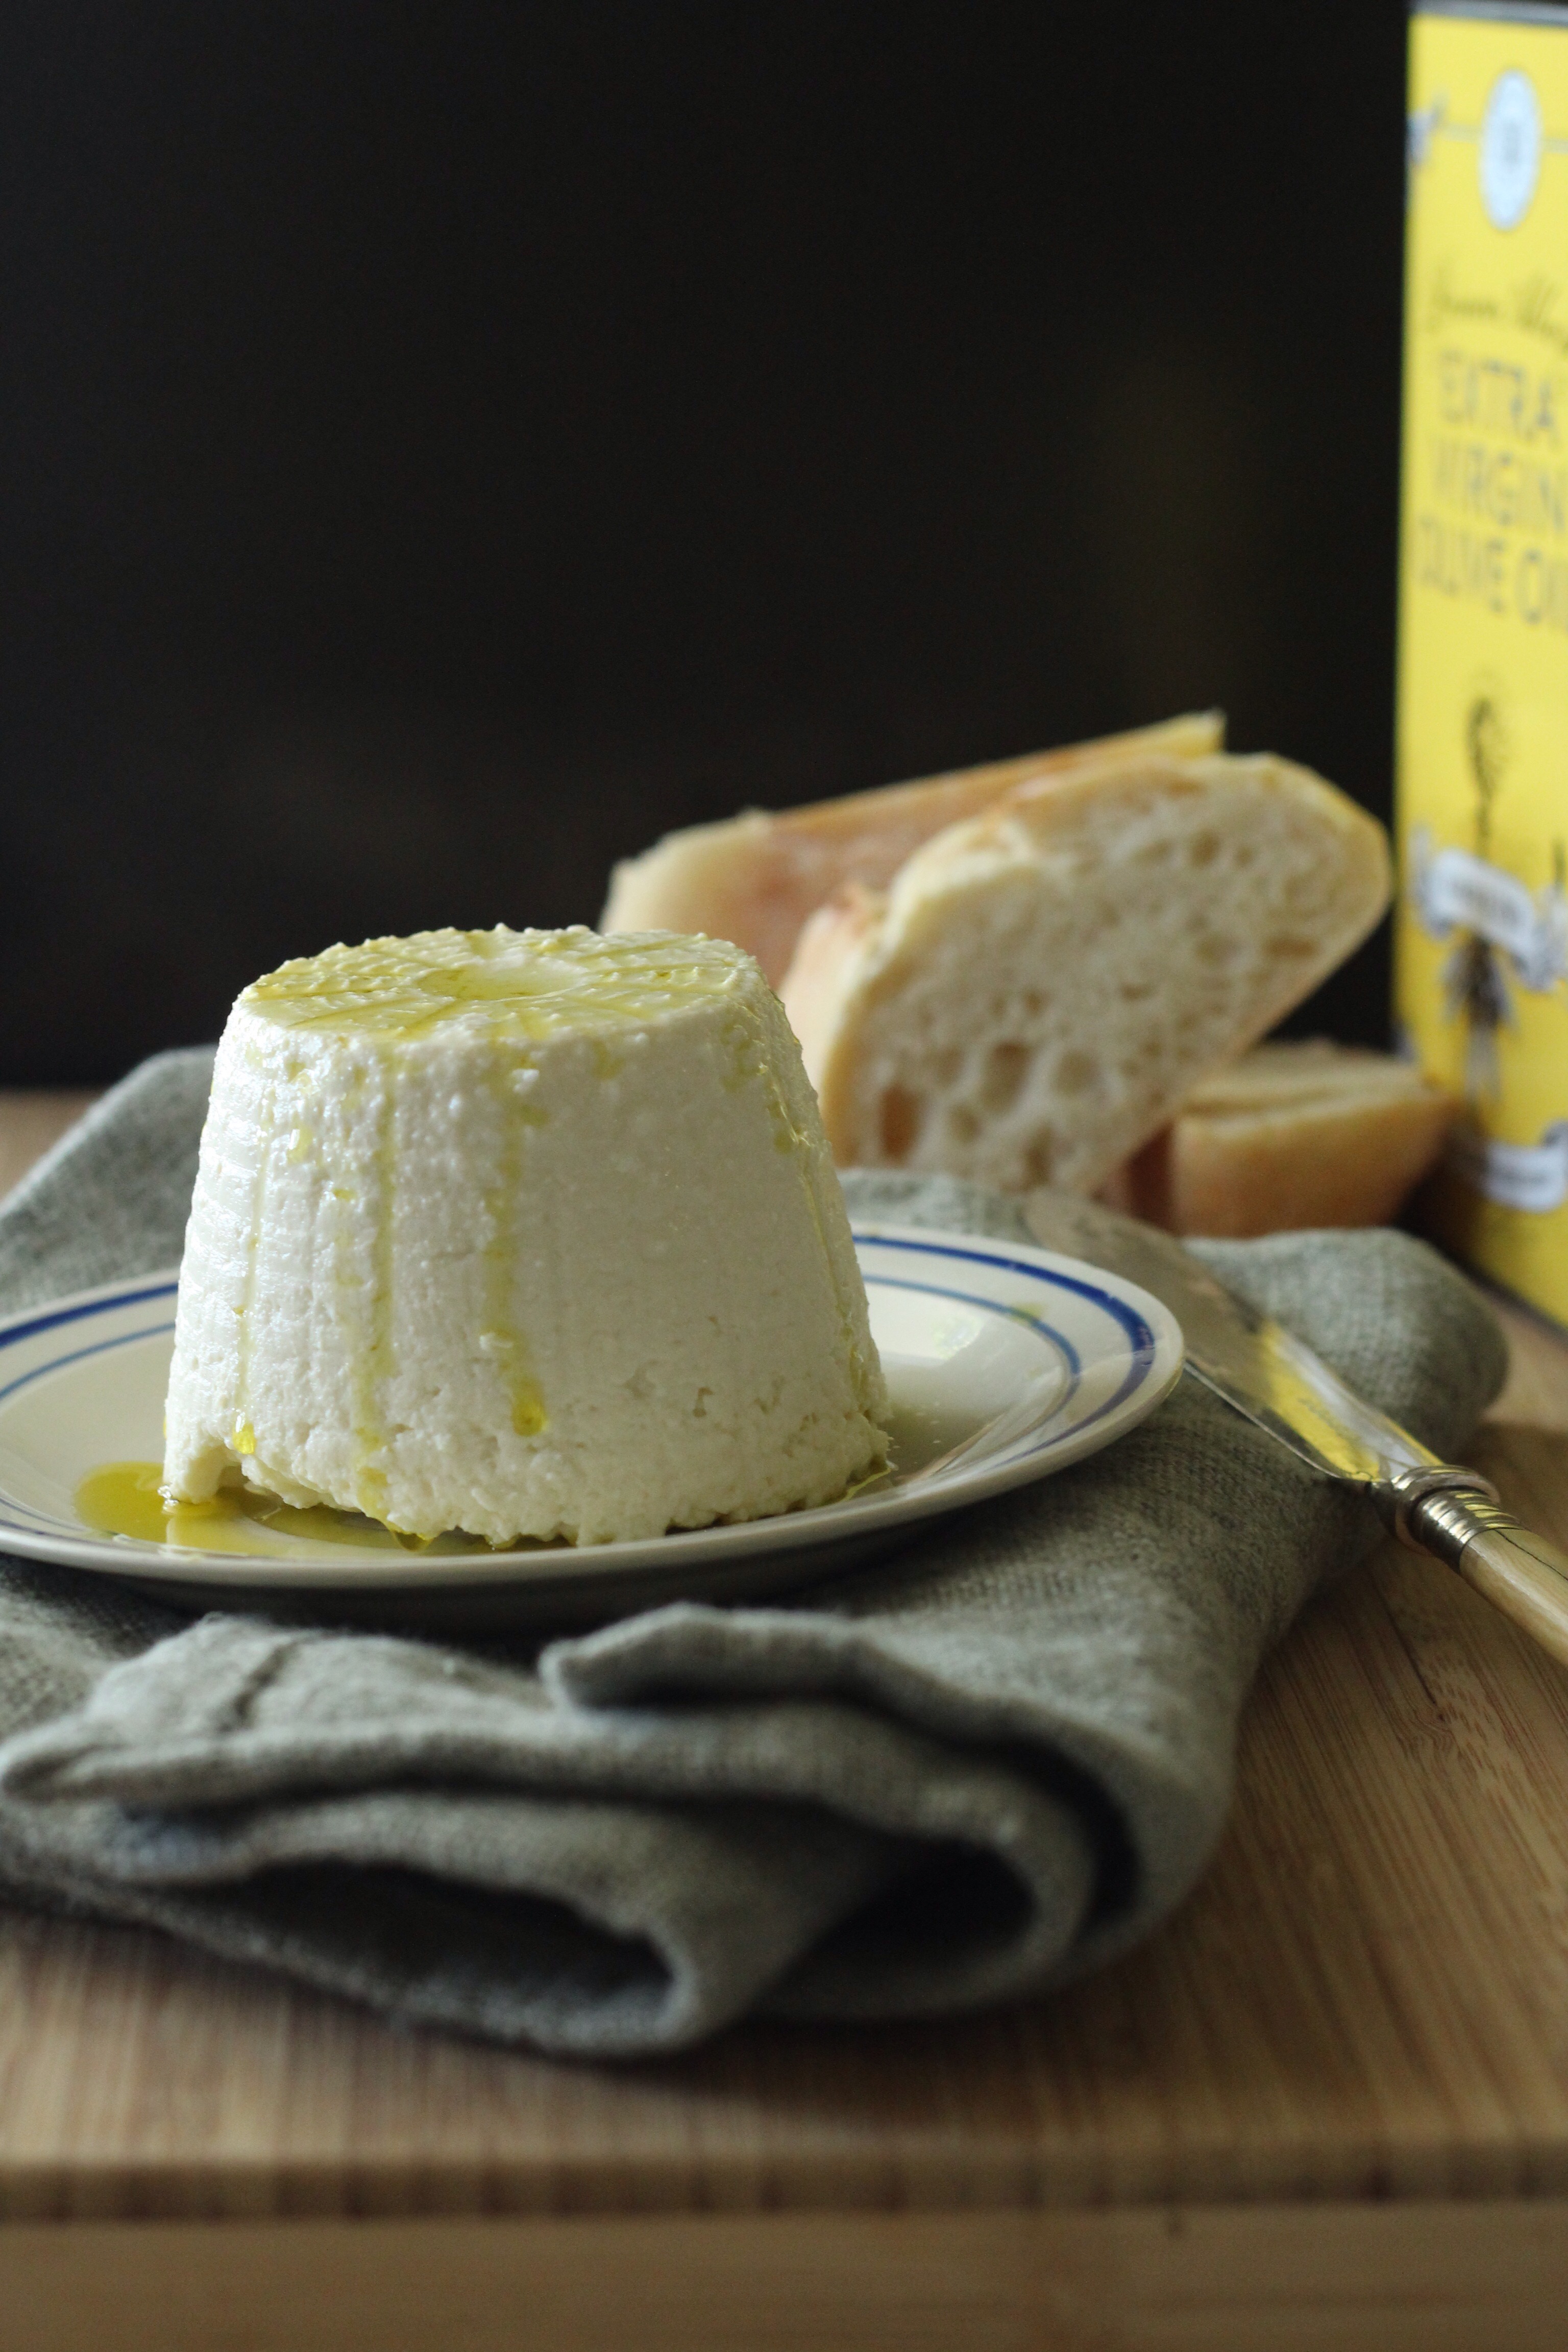
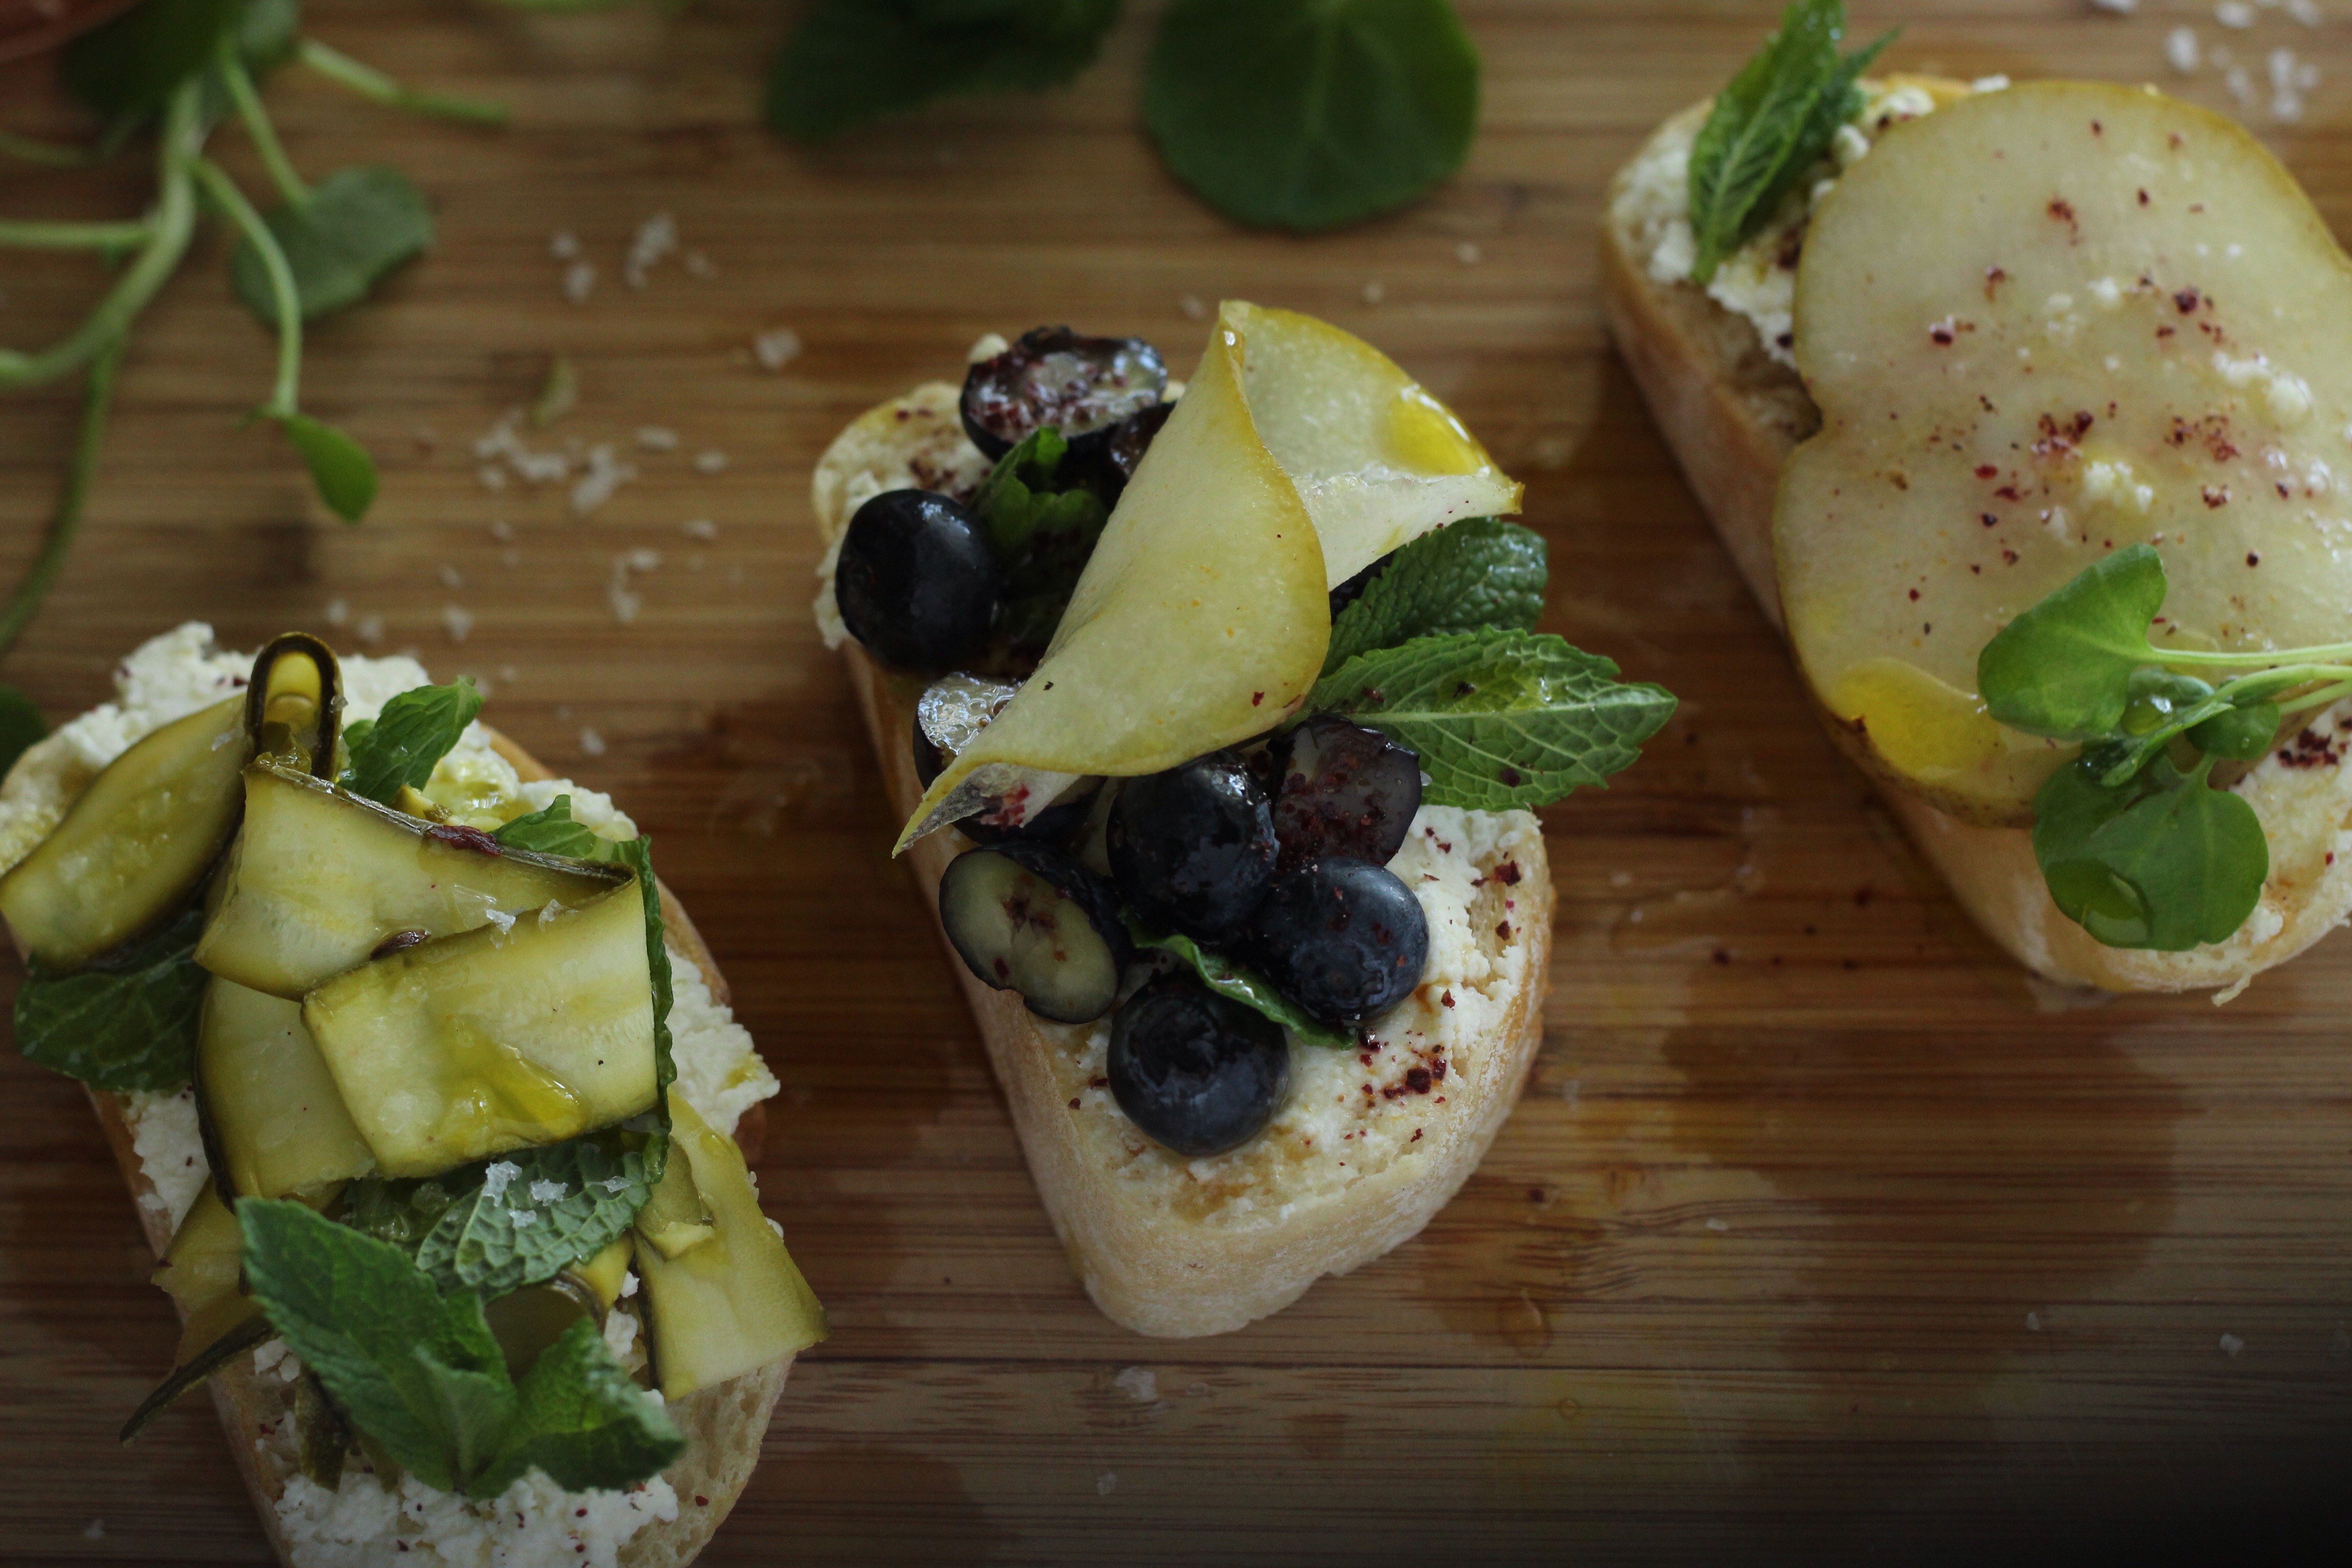
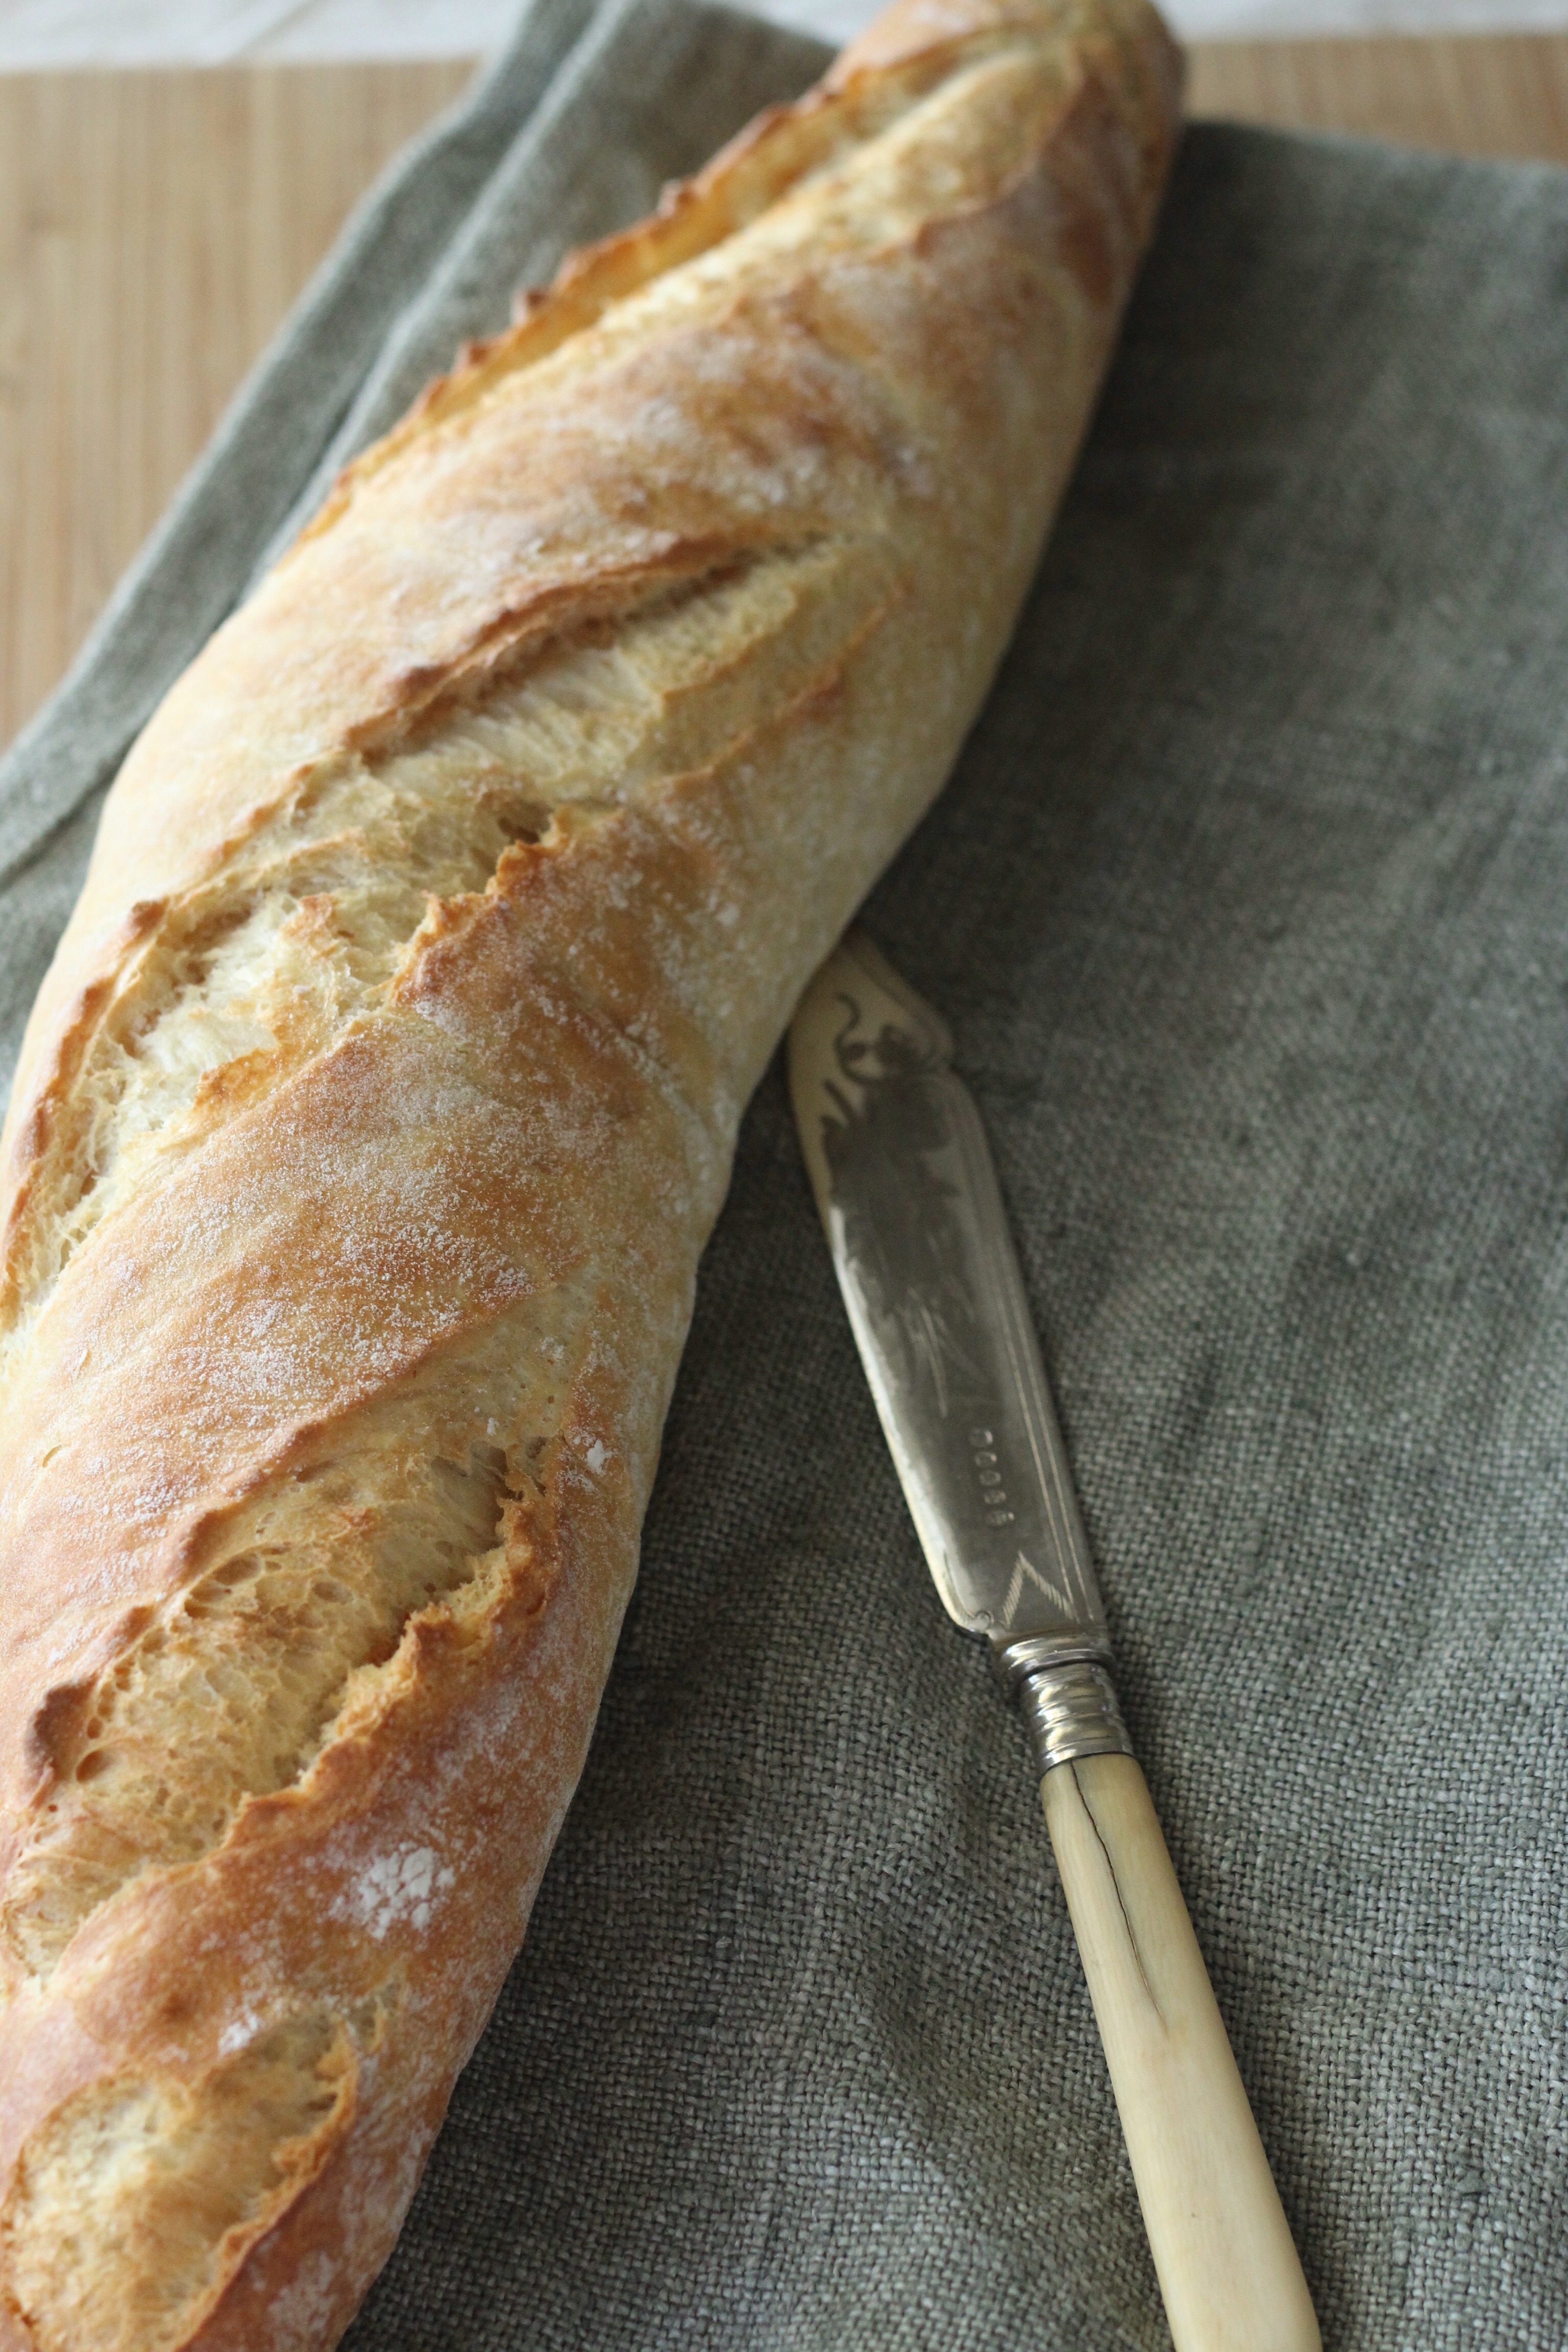
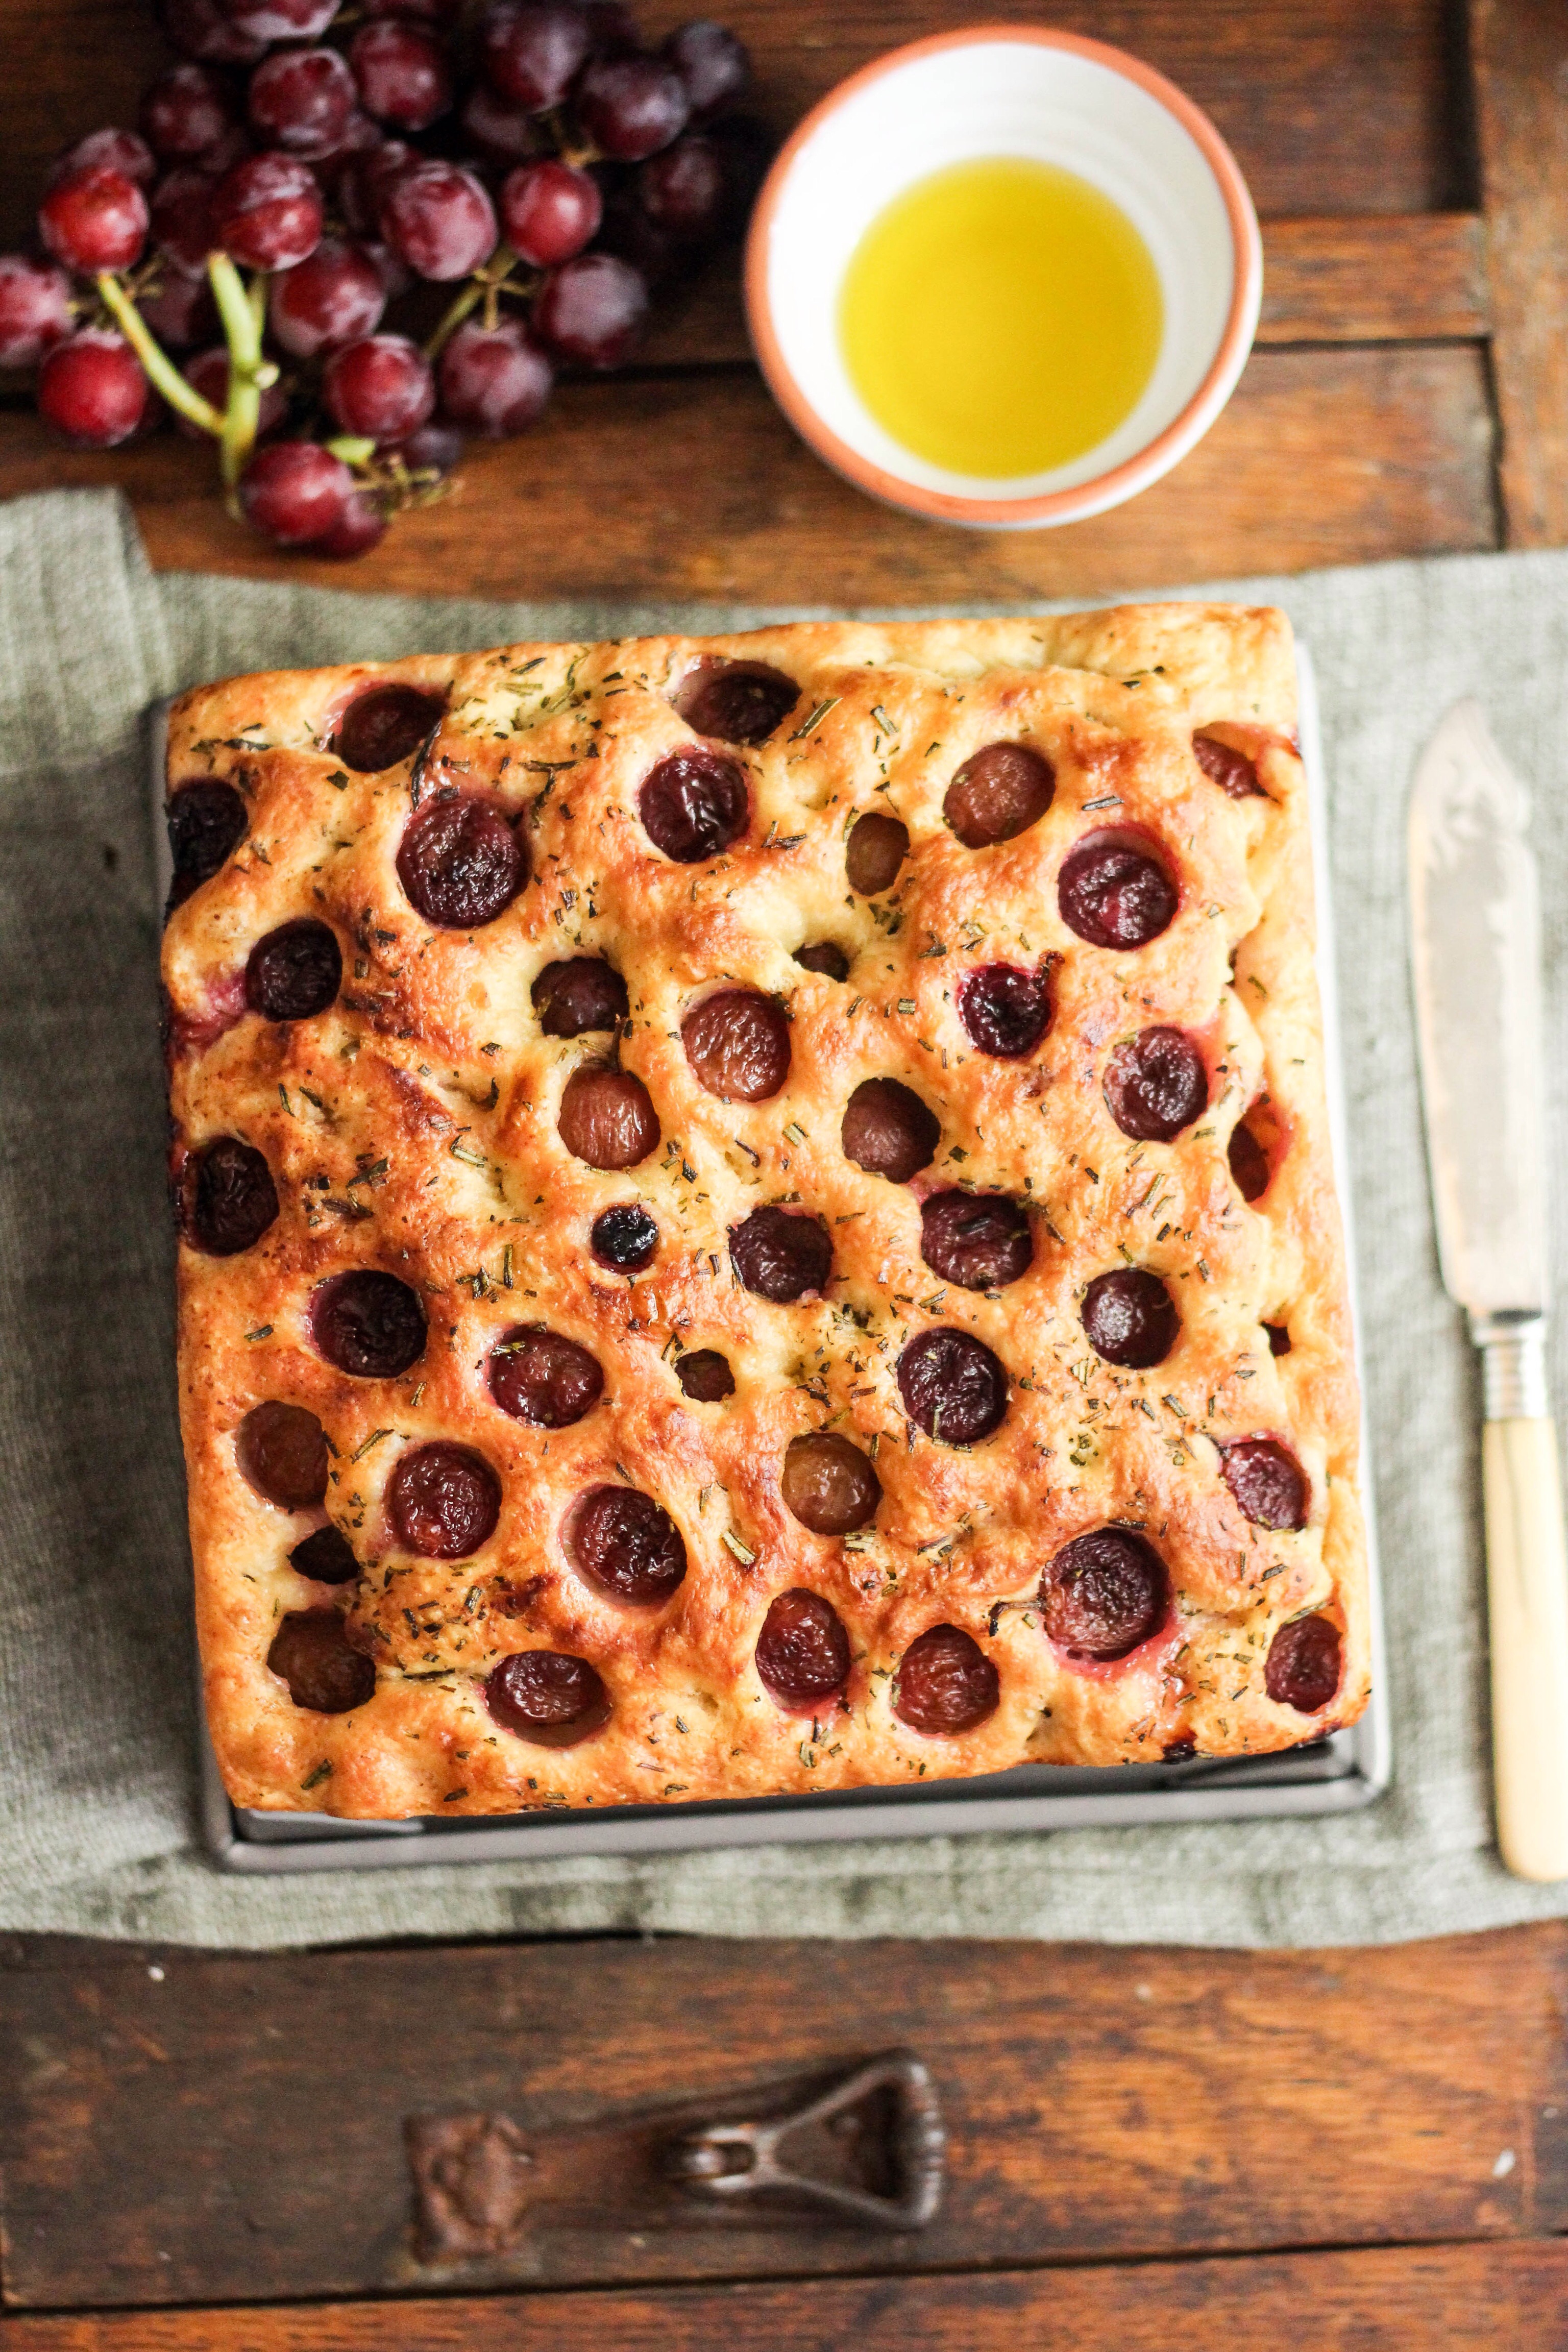
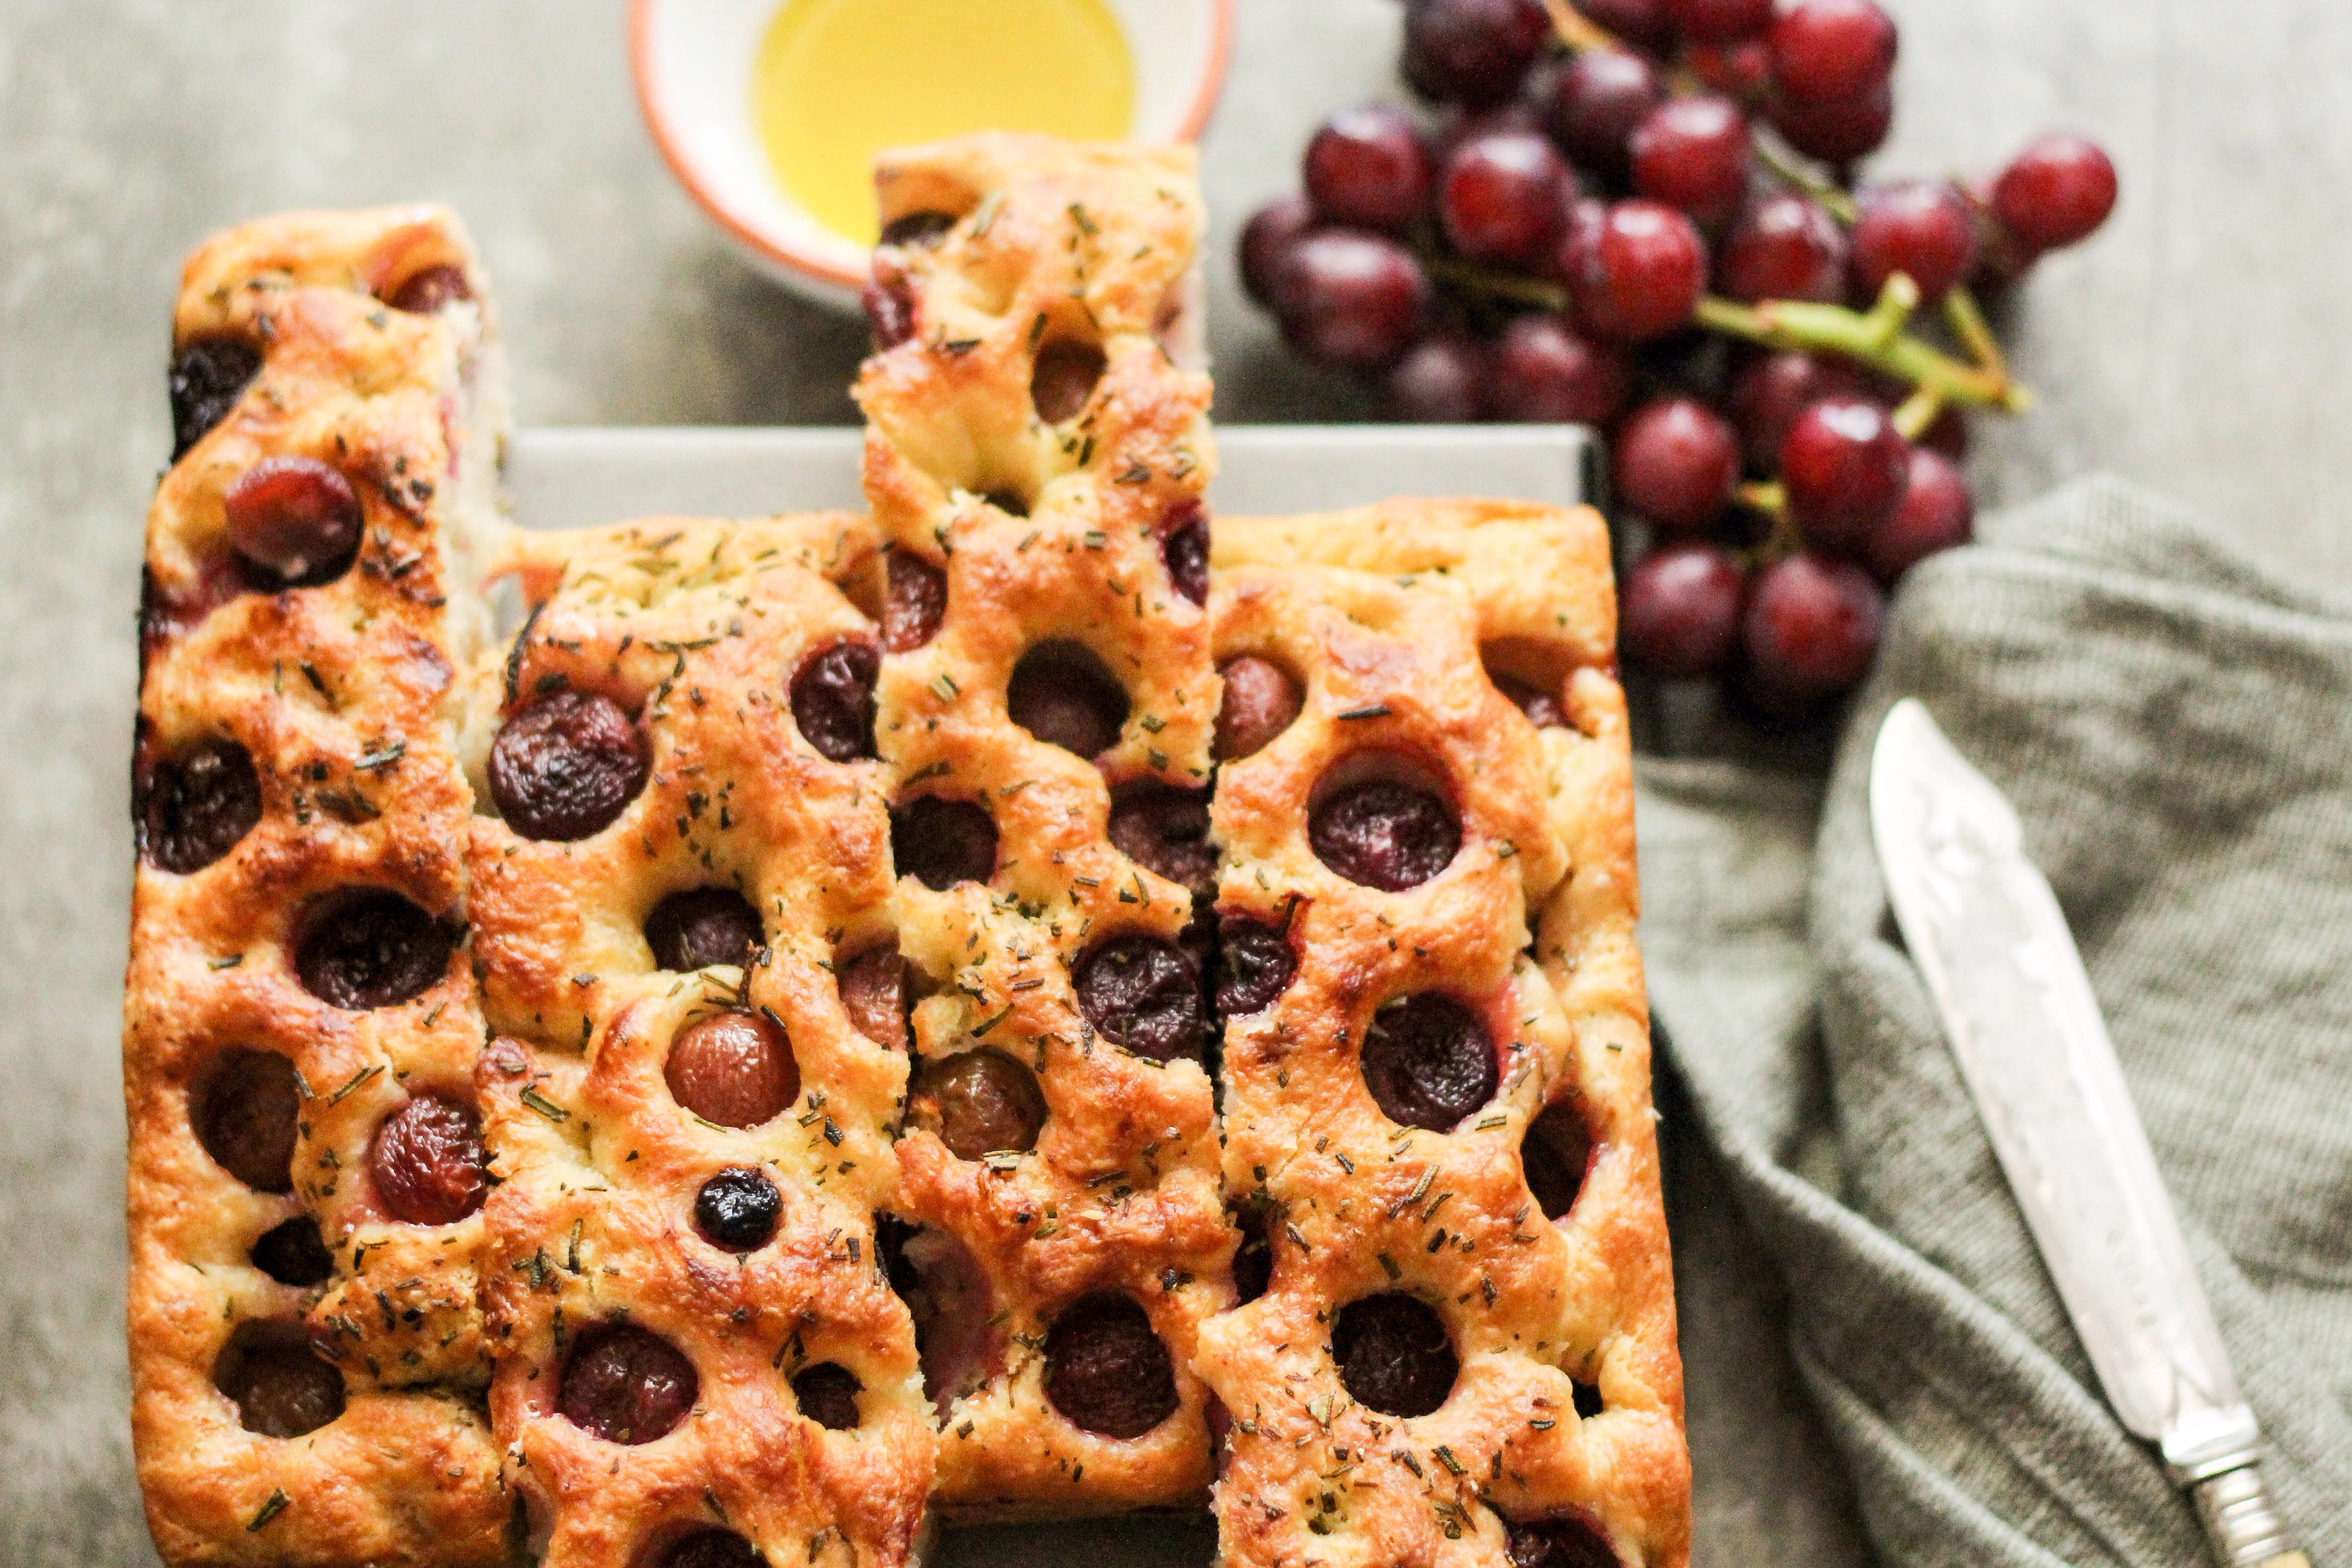
    (Cue the Oprah voice) I Love Bread! and thank god I am not gluten intolerant. I cannot imagine my life, I cannot imagine life in general without the sustenance which is bread. So as an ode to my great love of bread, I recreated a recipe adapted from BBC GoodFood , a no knead focaccia with an interesting twist. 

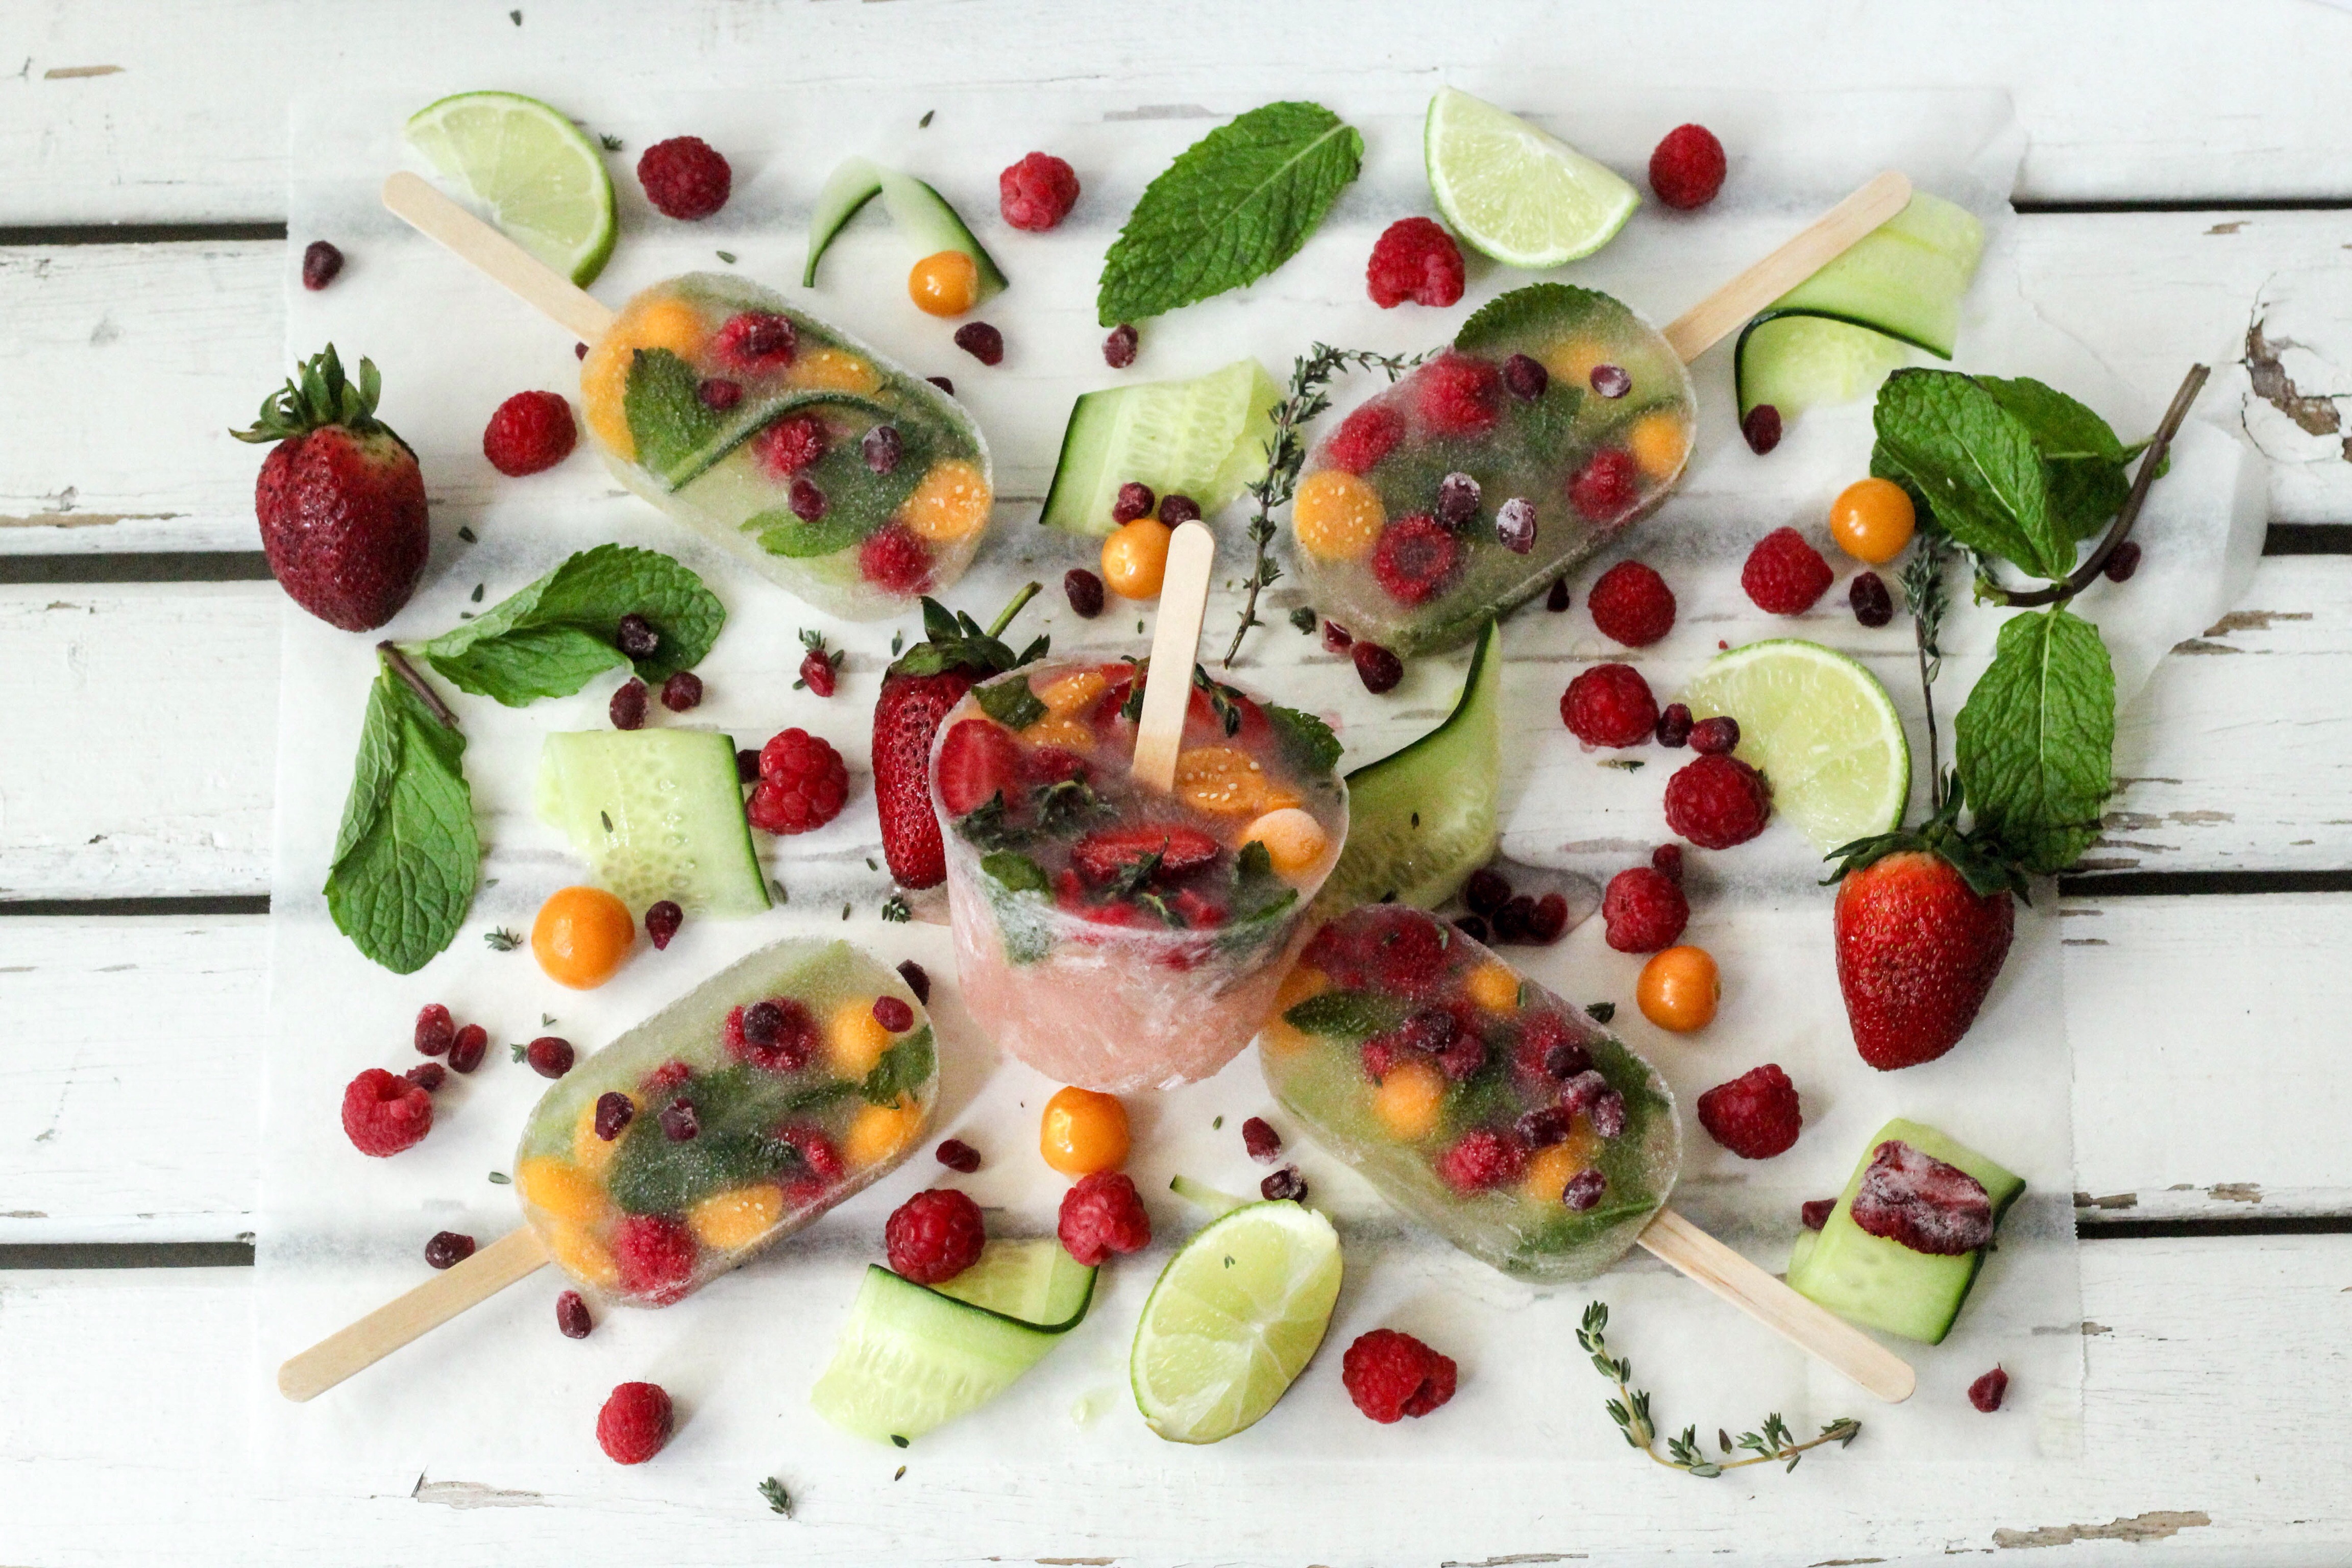
    The photos were taken yesterday early noon as soon as the bread came out of the oven. I started making the dough Monday evening already to ensure successful proving. The red grapes were really sweet, strangely enough not only did they look like cherries but they had the same sort of sweet taste too. These grapes are great for snacking without all the guilt of crisps or sweets. I’m a notorious snacker and I’m trying to make a real effort to snack healthier these days, more for health reasons than anything else. 
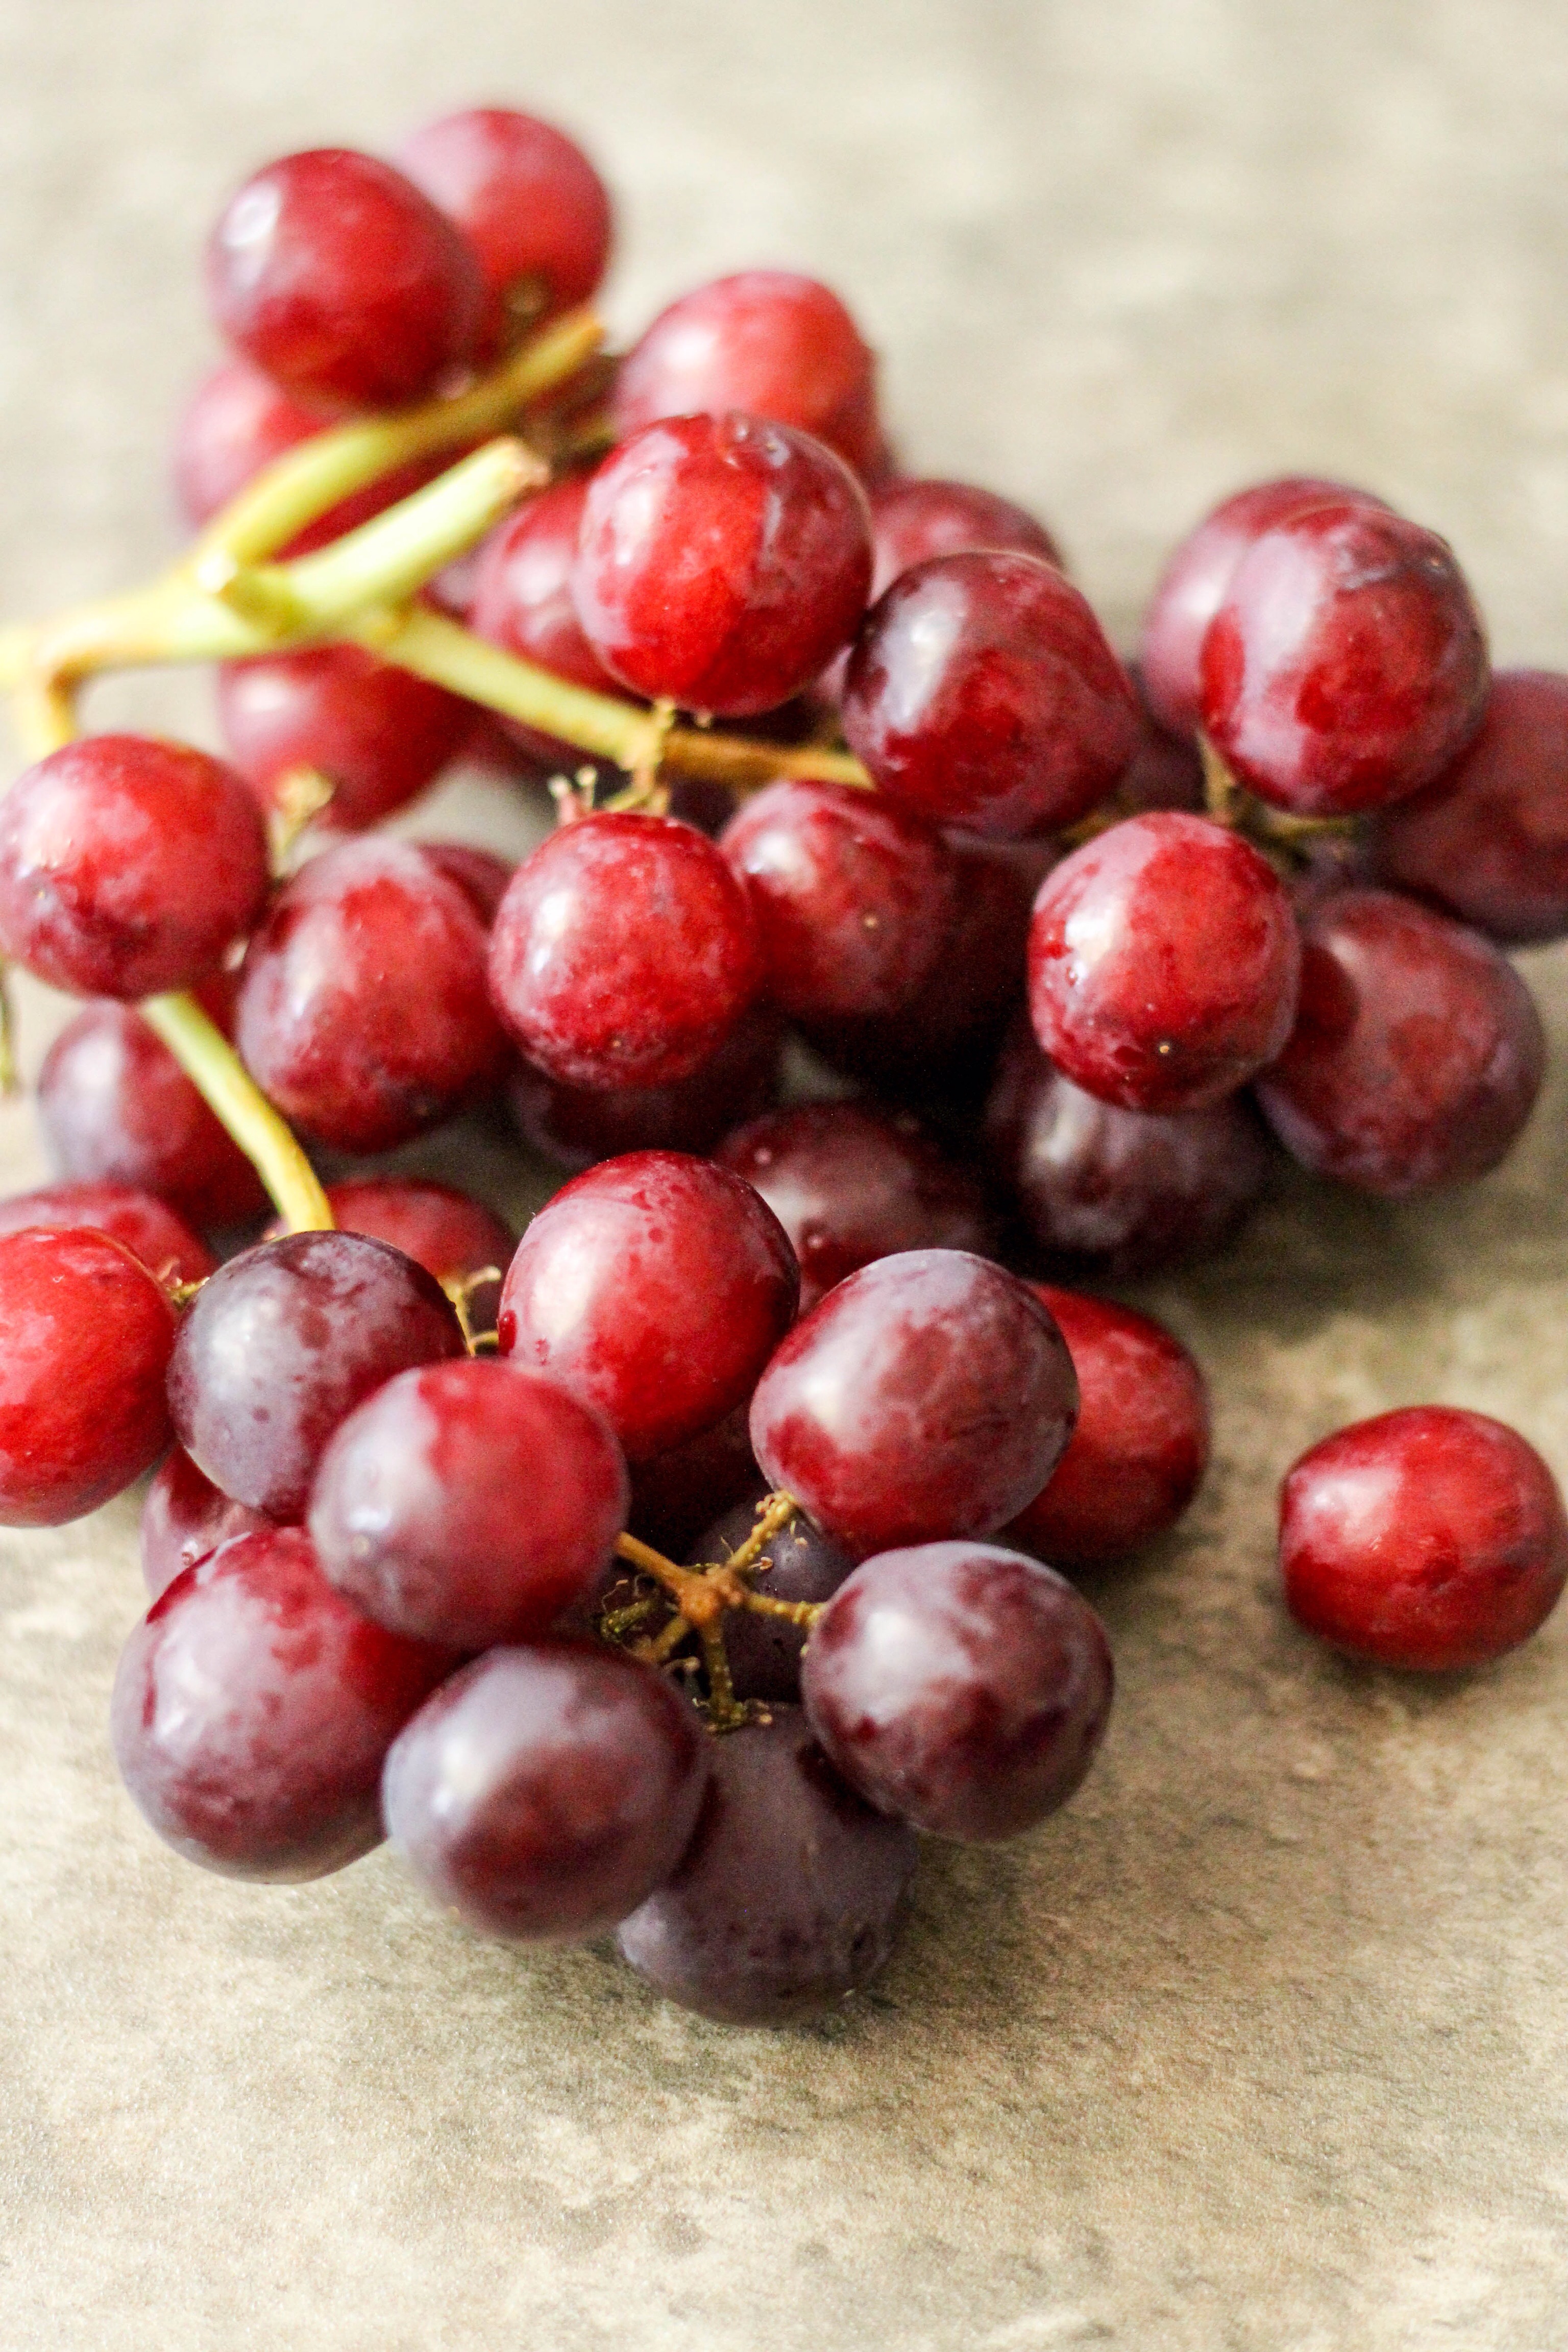
    A tad off topic, this time of year Cape Town gets very busy, the craziness lasts till mid-end of January, I do love that fact that people continue to visit our unique country and city. There are many times I feel incredibly privileged to live around such beauty and authenticity. The crazy traffic on the roads and in the shopping centres is something you learn to tolerate and avoid if you’re lucky, but there’s no place I’d rather be this time of year, than right here in my home city. 
    Dominique x

  • Aubergine fries with a honey balsamic drizzle.

    Aubergine fries with a honey balsamic drizzle.

    I’ve recently started to  broaden my food magazine perusing to international territory, reading online is one thing but I’m a sucker for good old paging through an actual book/magazine. Yes, I know not very Eco-friendly, but I’m tradionalist at heart! Sadly, we don’t have much of a wide selection of food magazines here in South Africa, so because I scour Delicious Australia’s site on a weekly basis, I spotted the UK version and rushed home to immediately page through it( I do love the smell of fresh magazines) I am quite proud of our food mag scene in S.A but there are so many fresh ideas in the international ones  I am so excited to try out all before reading the entire magazine, my excitement seems to get the better of me sometimes… 

    This recipe comes straight out of the September issue of Delicious UK, chosen and submitted by a reader, she described the fries as ‘light, crisp, but not greasy’. 

    Ingredients

    • 3 medium aubergines/eggplants sliced into batons
    • 1Tbsp of Salt
    • 1 medium free-range egg
    • 250ml iced water
    • 90g plain flour
    • 1/2 tsp baking powder
    • 1 litre sunflower/canola oil for deep frying
    • Balsamic glaze to drizzle 

    Method

    Place aubergines batons in a colander and sprinkle over salt.set over a bowl, then place in a fridge for 1-2 hours so the aubergines can release some of their juices and firm up. When ready, lay out on a kitchen towel/paper, and blot firmly and rub to remove excess salt, then set aside.For the batter, whisk the egg and iced water until frothy. Sift the flour and baking powder into a mixing bowl with a pinch of salt, then slowly add the egg mixture in a thin stream into the flour, whisking to combine. Immediately stop whisking when combined.Heat the oil in a deep large pan, the oil should be approximately 180 degrees Celsius, reduce heat to keep at this temperature. In batches, dip the batons in the batter, and with a slotted spoon lift out to place gently in the oil(always away from you) and fry for 4-5 minutes until golden and crisp. Drain on kitchen paper. Serve with balsamic glaze, or like me, you can mix a little balsamic vinegar with honey and drizzle over the fries. As an extra special touch I finely grated Grana Padano Parmesan cheese over the fries, because why not, right? 

    These fries are life-changing, and such a great substitute to potato fries. The crunch on these fries are incredible, the flavour is that of a natural umami coupled with a sweet twist! I’m hooked! And definitely making these  for when I have friends or family over. 

    Let’s all make Meat-free Monday’s exciting again! 

    Dominique x

  • Apple Crumble Semifreddo.

    Apple Crumble Semifreddo.

    Semifreddo, is Italian meaning ‘semi cold’ dessert. Unlike its cousin,Ice cream, this frozen delight does not include churning or tempering of eggs in its process of making, but whipping and lots of it, best be sure you have an electric handheld beater for this one.
    The recipe comes straight from one of my regular inspirations, Donna Hay. I’ve never made Semifreddo before, this seemed an interesting recipe to try out and experiment with, and what better time than right now, being on the precipice of summer! The recipe is super easy to recreate at home, with little effort and or need for any other equipment.
    While I’m on the topic of frozen dessert, it’s no secret that my obsession with ice cream is, well, an unhealthy one. There’s a new ice cream parlour that has opened its doors not too long ago in Cape Town central, that I absolutely have to check out soon. But more on that later! I went sourcing for backdrops and background material yesterday and found these lovely gems at my local tile store. I love the texture it lends to the overall look and feel of the shot. For now I’m leaning towards a more rustic style in my photos. I am completely enamoured with the depth and character it adds to shots.

    Remember that exciting bit of news I mentioned a while back? I’m counting the days till all can be revealed! 🙂

    Dominique xo

  • Gin and tonic ice lollies.

    Gin and tonic ice lollies.


    Inspired by my recent visit to the Royal Hotel in Riebeeck Kasteel, the Gin and Tonic we had there was out of this world! Possibly the best I have tasted so far. I am no G&T aficionado and neither am I that much of a frequent drinker, but this may just be the game changer. The Gin that the bartender used for our G&T’s were that of Wilderer Fynbos infused gin, (and as mentioned in my previous post)together with seasonal gooseberries, strawberries and a slice of lime, all the flavours were perfectly balanced and came together in a rather unusual cognac glass, but it worked. 

    I’ve been itching to make alcoholic ice lollies since I purchased a ice lolly Kit at my local CNA store. The kit comes with a four part mold, 50 lolly sticks and a little booklet with instructions and a few recipes, some related some not so related to ice lollies or frozen desserts for that matter… Alas, I trawled the Internet for inspiration and went to one of my bookmarked sites as a last resort(but should have been the first) Delicious UK,where I saw a Gin and Tonic ice lollie recipe. It’s extremely simple, but do make it a day before so as to set overnight in the molds. If you, like me can be a bit heavy handed with the pouring of drinks, that’s okay, because I mainly used the recipe only as a guideline. Add ingredients according to taste.
    With the satisfyingly refreshing G&T at the Royal hotel in mind, I added a few gooseberries, strawberries and lime juice to the mixture to set. I unfortunately didn’t have an artisanal fynbos infused gin on hand, so I used a Kumquat infused gin, that I had purchased a few months back from one of my favourite places to go and visit, a farm nestled at the foothills of the Simonsberg mountain range, Babylonstoren. 

    I really love the pop of colour the berries lend to the contrast of the lush green of the mint leaves against the white backdrop. The ice lollies are just as refreshing as the actual tipple. I can tell, I will be making a whole lot of ice lollies, ice cream and sorbet this summer. 

    Dominique x

  • Deconstructed lime meringue.

    Deconstructed lime meringue.

    I took it upon myself to recreate a classic and also critically deconstruct it. This in essence is the very teaching and philosophy of Massimo Bottura, celebrating nostalgia but asking questions. I made a deconstructed lime meringue dessert with crushed ginger cookies as the base, and a lime meringue ginger cookie sandwich(think ice cream sandwich style, but way better). So with my fat pants on and guilty conscience happily abandoned at the door (this is a judgement free zone) so please feel free to recreate this dessert and even top it and take it to another level of indulgence! 
    I made the speediest and tastiest lime curd just over a week ago, and it’s been sitting on the shelf of my fridge in a sealed jar staring at me asking me to eat it. To be honest it had me at hello! The lime curd was made in the microwave recipe found on Food52. The rest of the recipe for the desserts I have developed. I simply crushed ginger biscuits and drizzled with a little ginger syrup(a sweet twist) I then filled the glass with the lime curd and topped off with the whipped meringue and blowtorched to get the desired toastyness. Any excuse to use my awesome little blowtorch! 

    For the cookie sandwich, assemble the curd between the biscuits, gently press together and smooth out edges if oozing out, then top with the meringue and toast with the blowtorch. I think I had way too much fun doing this! 


    The photos were taken just before noon again, I find I take less photos these days when shooting for one post, as I find that I don’t need to take hundreds of photos to get that good batch of photos like I used to do. This must mean I am improving slowly 🙂  I’m super excited to share next week’s posts and photos with you! It’s going to be super chilled 🙂 that’s about all I’m letting you know for now. 

    This post was collated whilst listening to the incomparable David Bowie. Specifically the song ‘Heroes’. 

    Happy Heritage day everyone! xo

  • Ricotta on crusty bread with pickled Courgette and Pear. 

    Ricotta on crusty bread with pickled Courgette and Pear. 

    My love of cheese knows no bounds! Feta, cream cheese, cottage cheese, Brie, Camembert, Goat’s cheese or 24 month matured Parmigiano Reggiano, name it and I’ll be there with a bottle of wine to pair it with! Ricotta is so very versatile, I mainly use it as a substitute for cream in my pasta sauces, it makes the texture that more luxurious and velvety smooth. But ricotta is more than just an addition to a great sauce. I usually make my own from scratch which is rather easy and foolproof. I have a healthy obsession (excuse the pun) of knowing exactly what goes into my food same can be said for what goes into my body. 
    Beside making a really creamy sauce, if there’s any leftover Ricotta, I make blueberry ricotta hotcakes/flapjacks that I smother in lemon curd and bacon, because why not? This time I wanted to do something a bit different and at the same time keep it simple. Simplicity in food sometimes is the key. 

    I bought a fresh plain rusticata loaf at my local Woolworths and this time purchased my ricotta, instead of making it, and also spotted some lush green courgettes. I made a quick pickle (I used 1 cup of white wine vinegar to equal amounts of castor sugar) and two cloves, a few cumin seeds and a few drops of this amazing white balsamic vinegar(Sonoma Harvest Passion fruit White Balsamic vinegar) the quick pickle is a tad unconventional, but it’s all in the spirit of experimenting and playing around with flavours. 

    I added thin slices of Courgette and Pear to the pickle, allow to simmer on a low-medium heat to let the flavours fully permeate and the speedy process of pickling take place. Take off the heat and assemble on thickly spread Ricotta on crusty bread sprinkled with a pinch of sumac and toasted cumin seeds and finish with a sprig or two of mint. I’m so enamoured with the lip puckering taste and crunch of the courgettes, I do like the pickled pear, the variety I used was really sweet, the pickling balanced the flavour of the pear beautifully. I made an extra one with blueberries for another tart flavour combination. There are so many flavour combinations one can experiment with Ricotta. 

    The photos were taken just after noon. Only once I have looked at them on my computer screen, did I realize how similar in some ways it is to my previous post, The ultimate toastie. I hope this post will inspire and fuel you with ideas for your next get together with friends and family.